Business ACH Services: How to Add Recipients to a New Template
Once you have created your business ACH templates, you can add recipients using the following steps.
To create a template, review our article How to Add, Edit or Delete a Template.
To schedule a template, review our article How to schedule a template.
Mobile
If you're using a mobile device, follow the steps below. For computers, go to the desktop steps
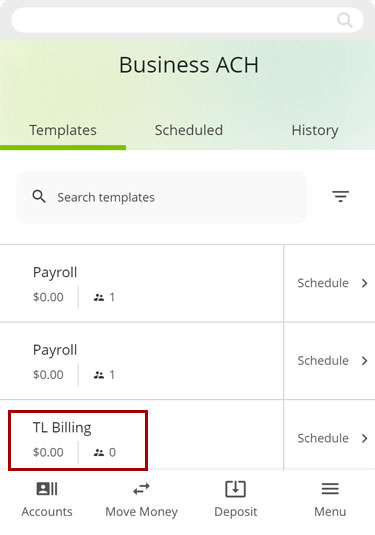
From the Templates screen, select the template you want to add recipients to.
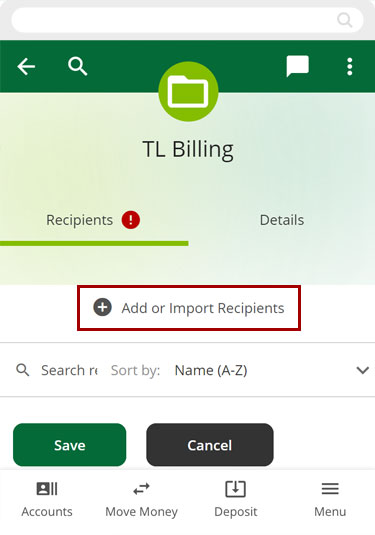
Tap Add or Import Recipients.
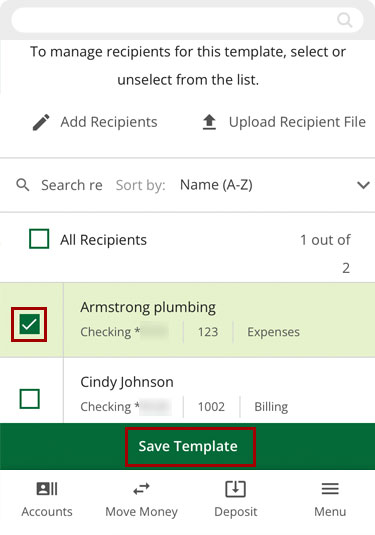
Select the recipient or recipients you wish to add. Tap Save Template.
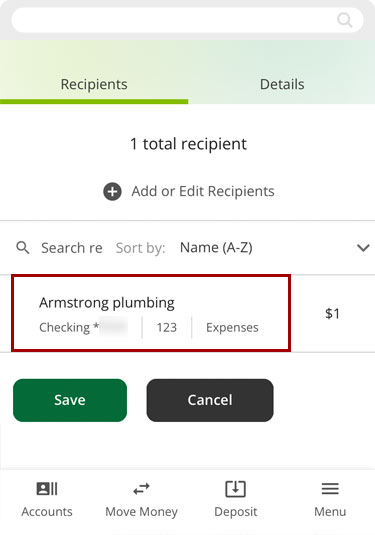
Tap the recipient(s) to view options.
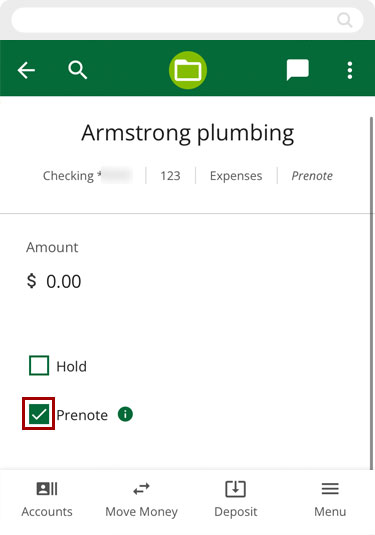
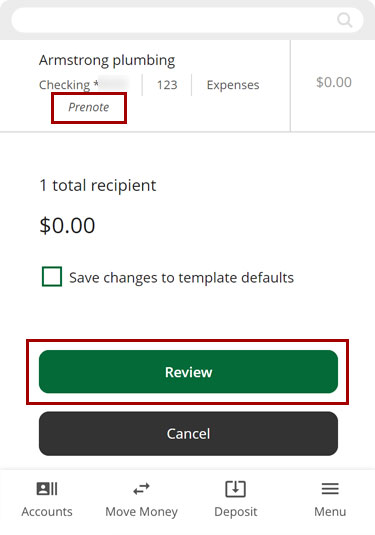
To validate that the other institution will accept the transaction to the account and routing number indicated, check the Prenote box and tap Save.
You will need to wait at least 3 business days before sending any live transactions.
Note: A prenote does not validate ownership of the account.
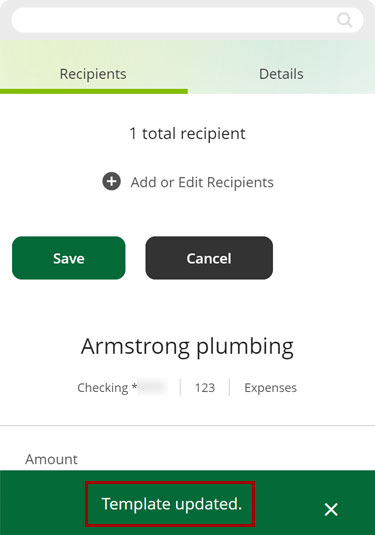
You will see a green banner confirming your template was updated.
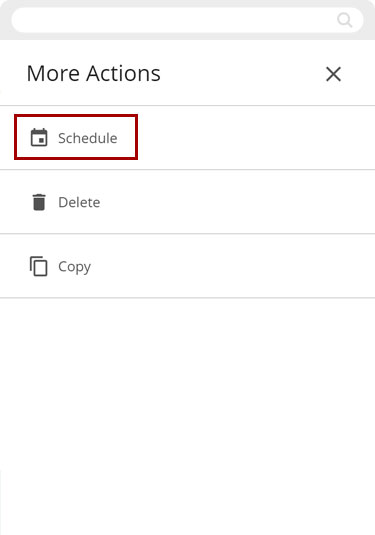
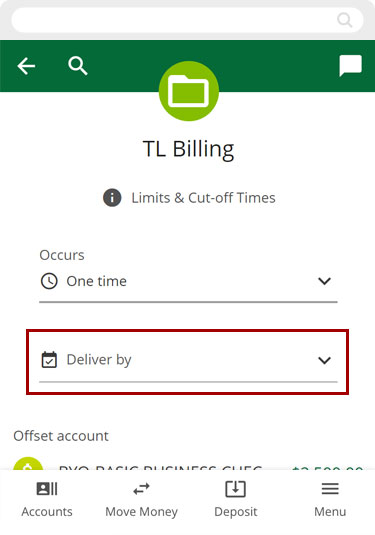
At top right, tap the three horizontal dots to open the More Actions menu and select Schedule to schedule your prenote.
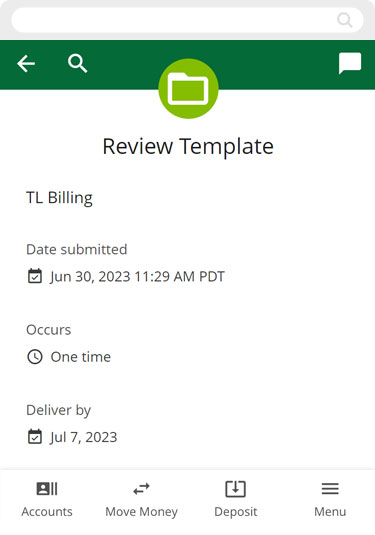
Select a Deliver by date to schedule the prenote.
Confirm that you're scheduling a prenote and tap Review.
If the information is correct, tap Submit.
Note: If a prenote is returned, we will notify you through your digital banking message center.
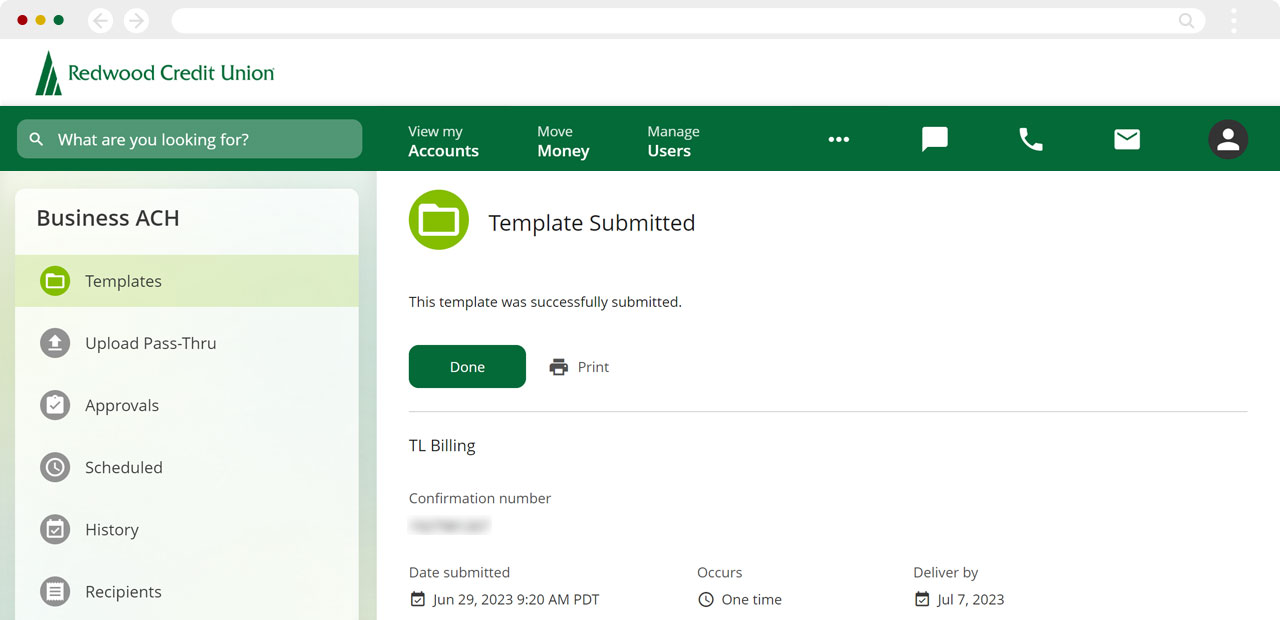
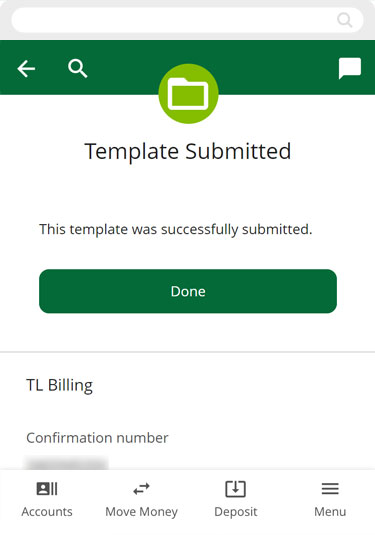
You will see a confirmation page that the template with the prenote was submitted.
Once you complete the prenote process, you can schedule your template.
Desktop
If you're using a computer, follow the steps below. For mobile devices, go to the mobile steps
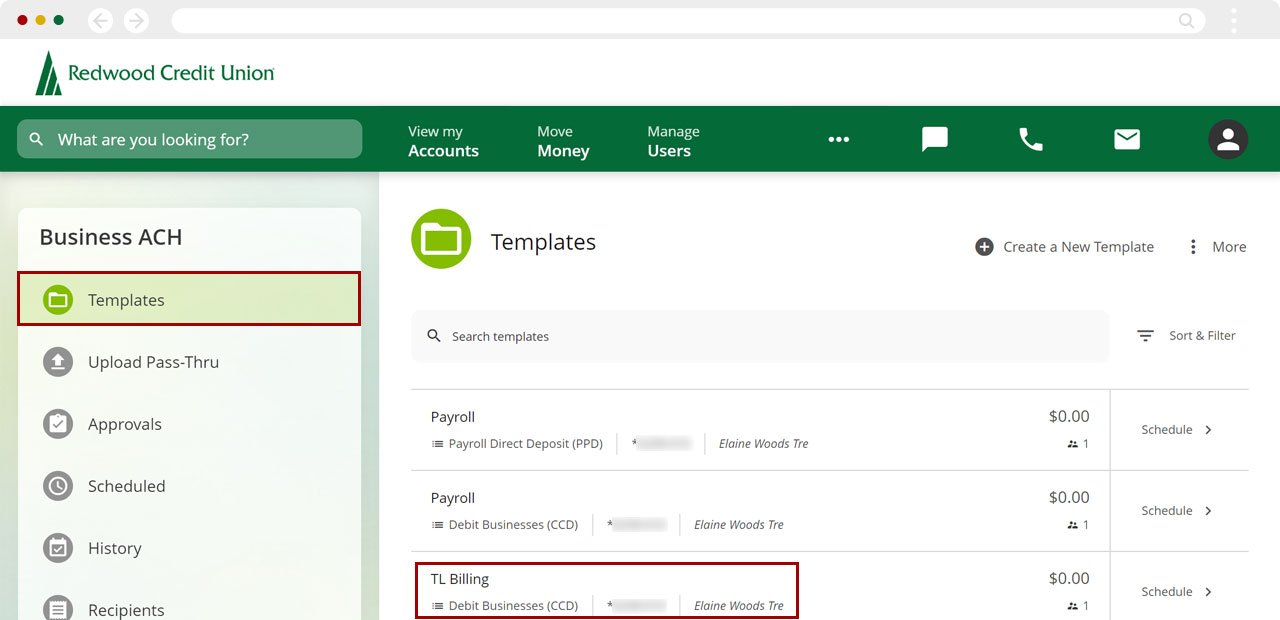
From the Templates screen, select the template you want to add recipients to.
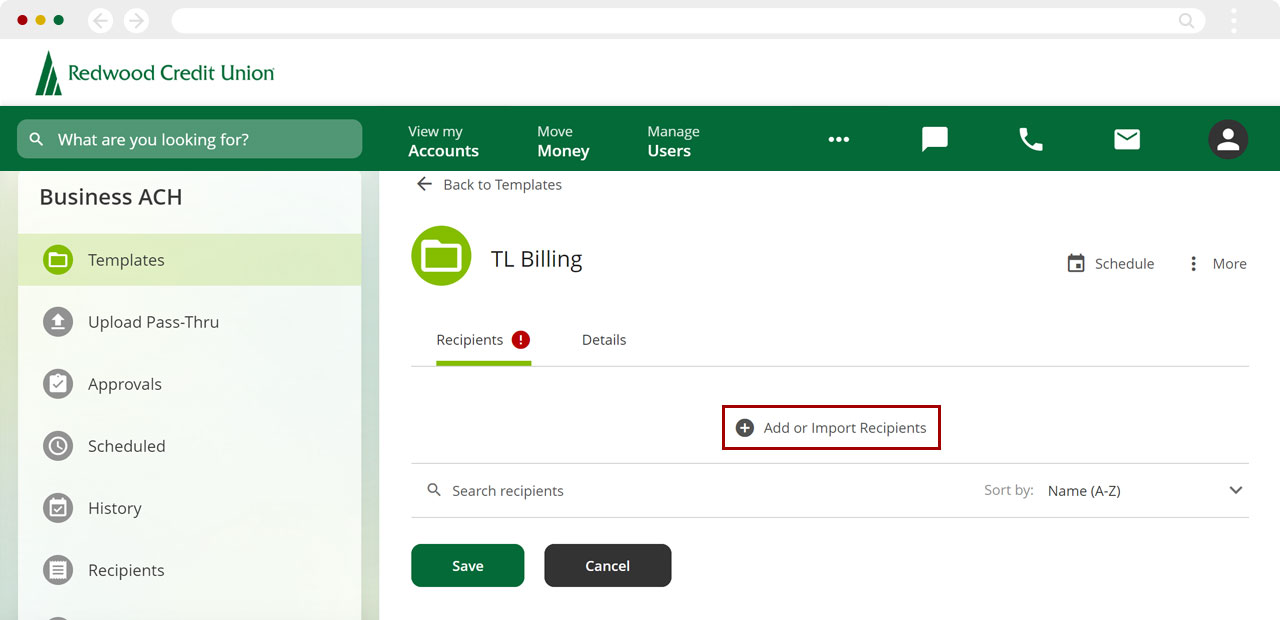
Click Add or Import Recipients.
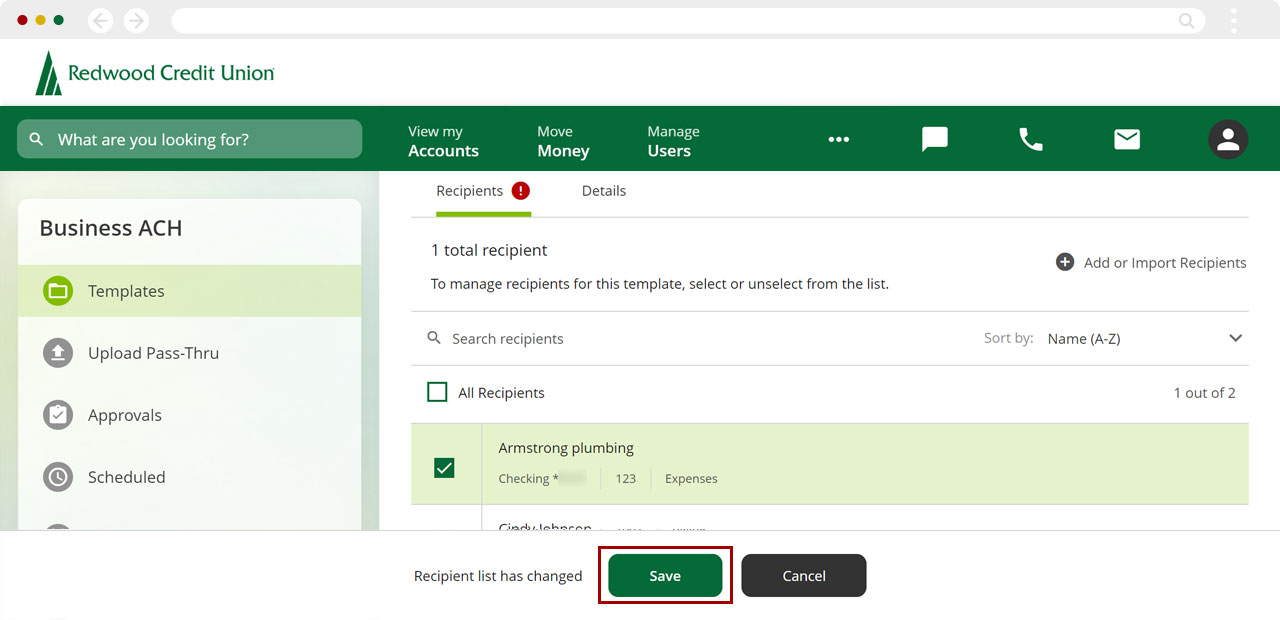
Select the recipient(s) you wish to add. Click Save.
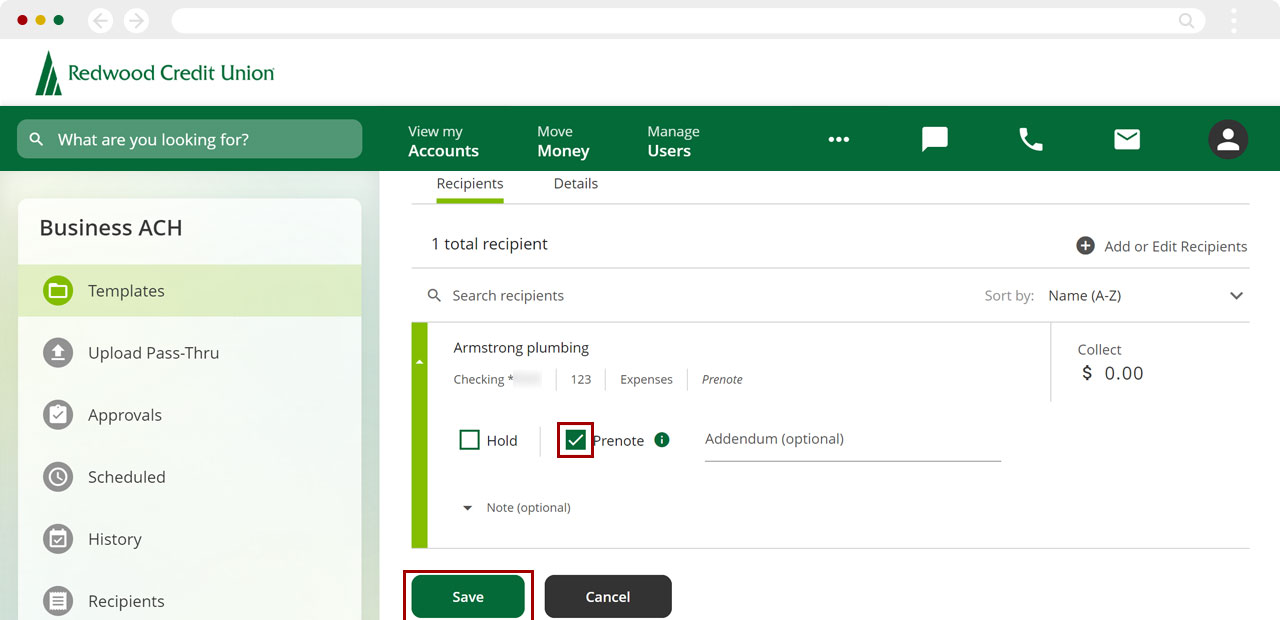
To validate that the other institution will accept the transaction to the account and routing number indicated, check the Prenote box and click Save.
You will need to wait at least 3 business days before sending any live transactions.
Note: A prenote does not validate ownership of the account.
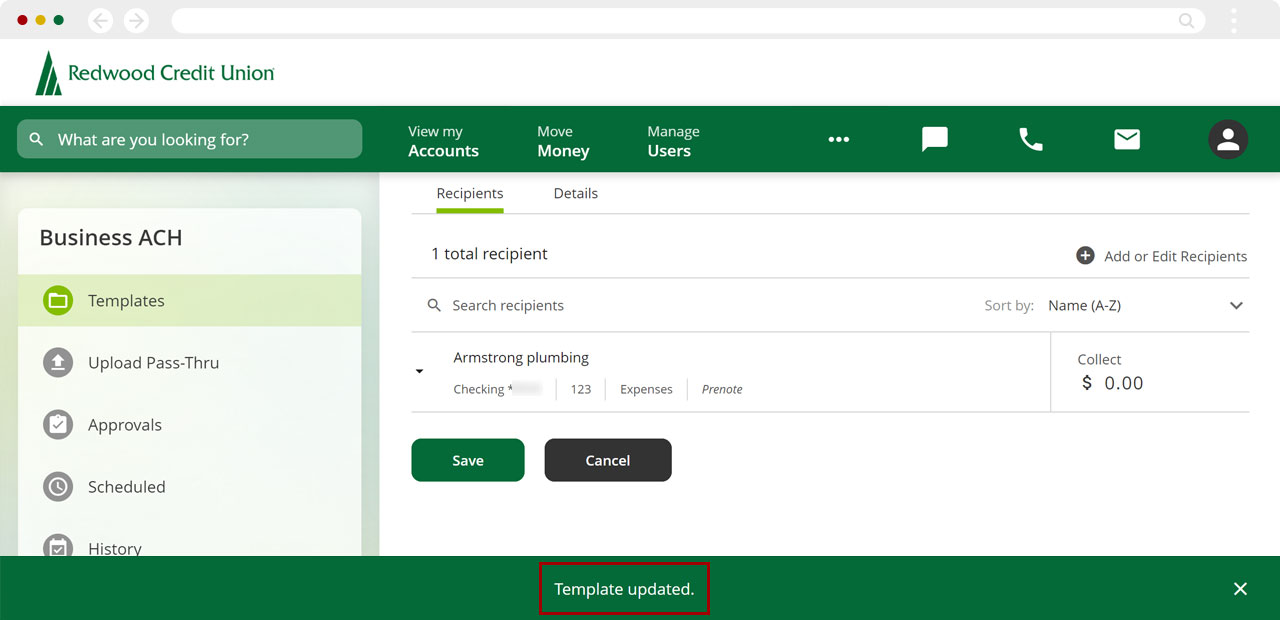
You will see a green banner confirming your template was updated.
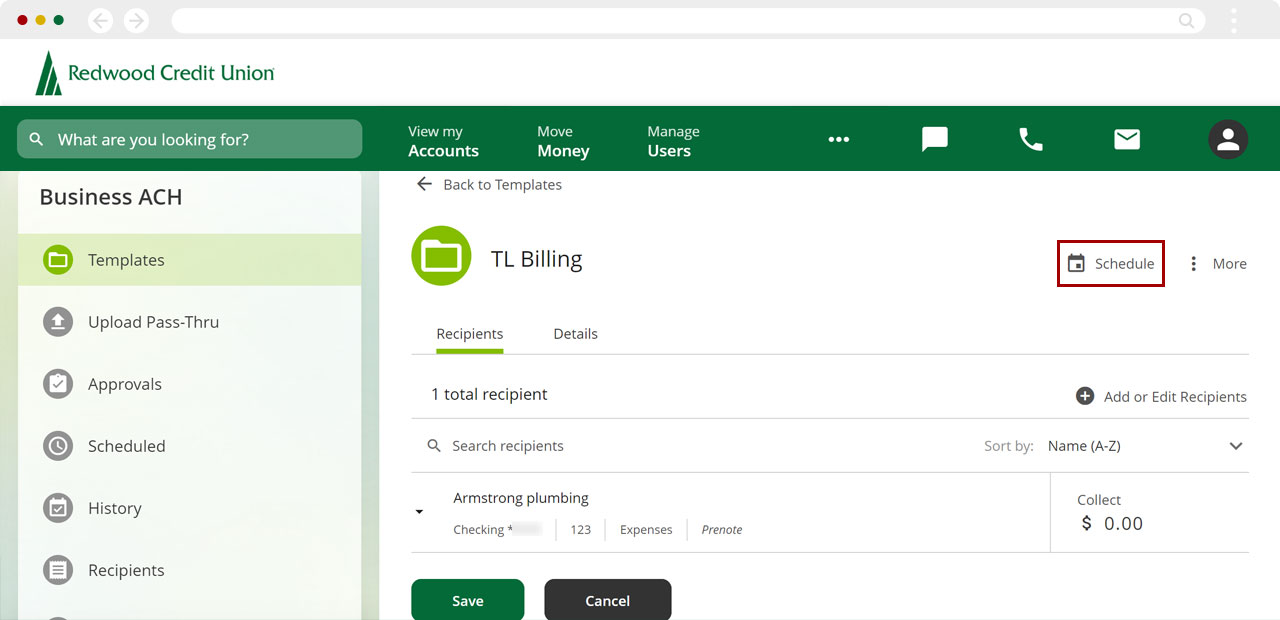
At top right, click Schedule to schedule your prenote.
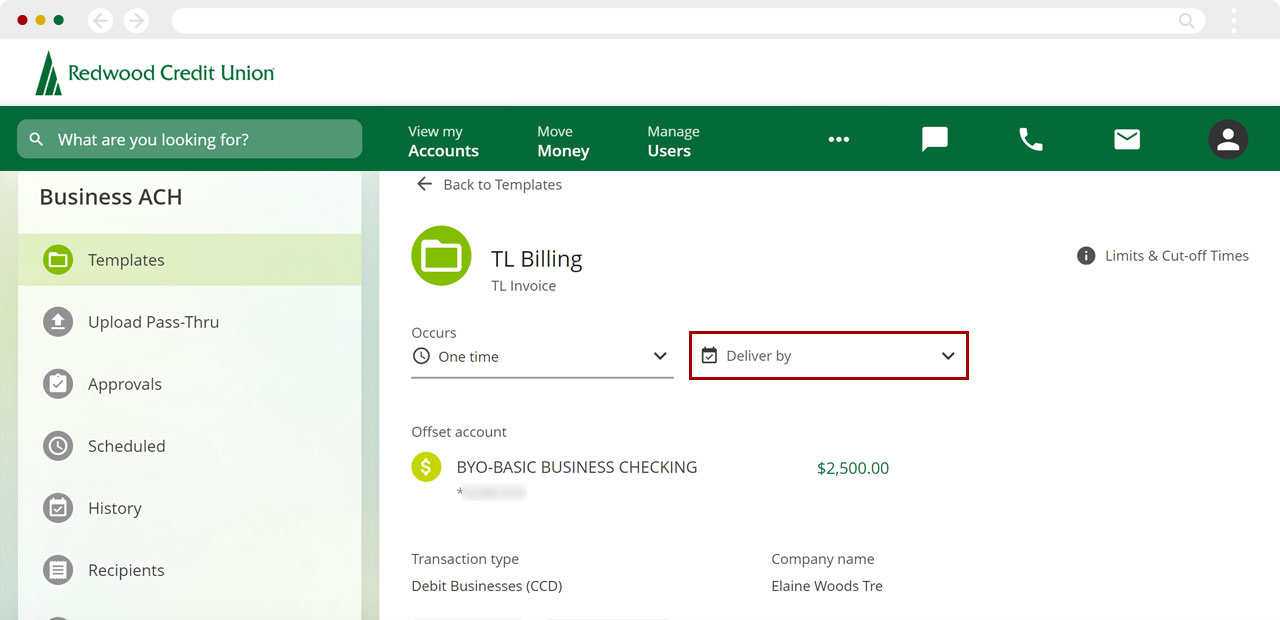
Select a Deliver by date to schedule the prenote.
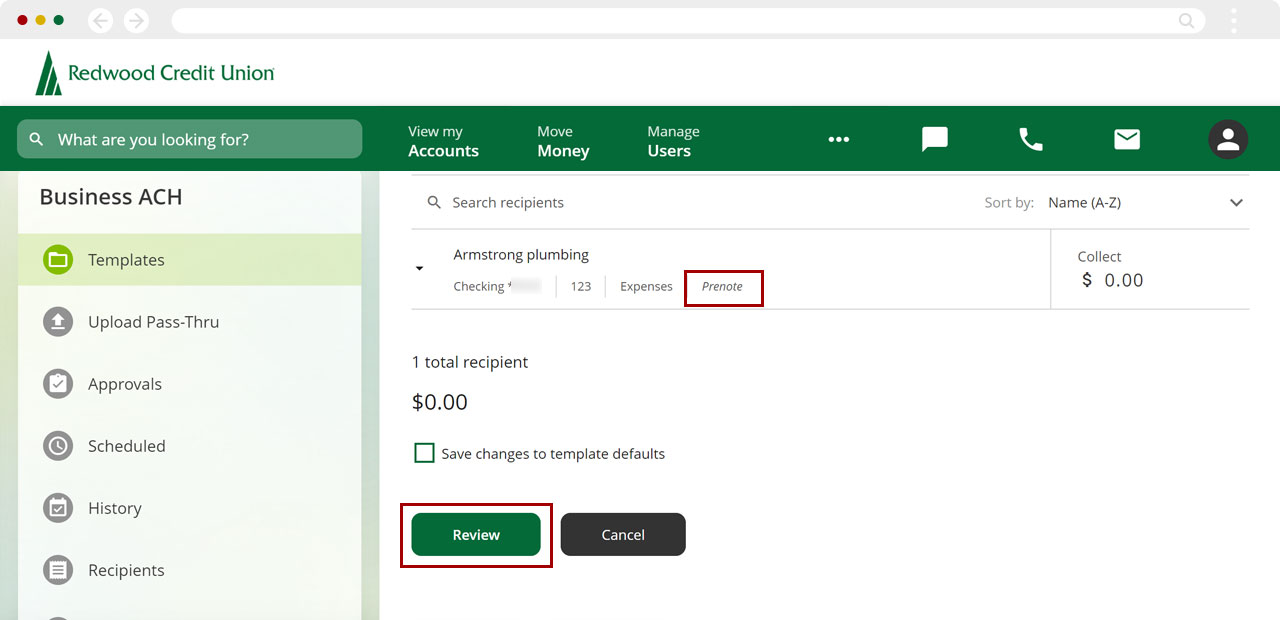
Confirm that you're scheduling a prenote and click Review.
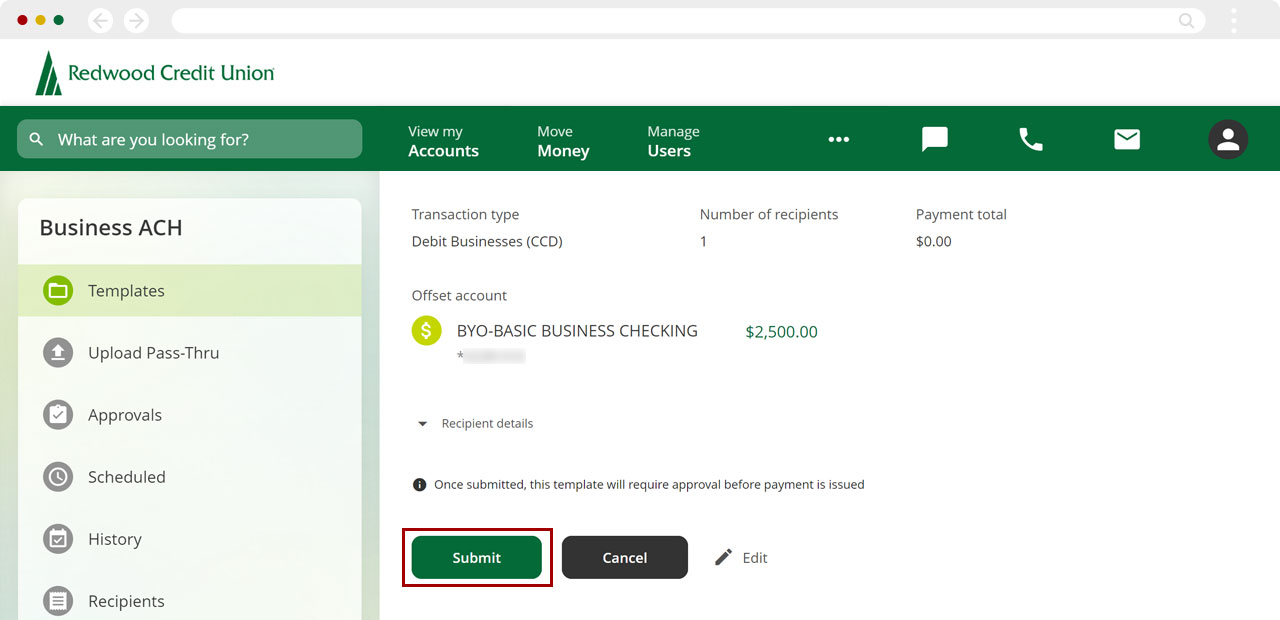
If the information is correct, click Submit.
Note: If a prenote is returned, we will notify you through your digital banking message center.
You will see a confirmation page that the template with the prenote was submitted.
Once you complete the prenote process, you can schedule your template.