Set up multi-factor authentication to increase your account security
Protecting the security of your accounts is important. You can rest assured that RCU’s digital banking is safe and secure. For an additional layer of security, you can also choose to enable the following settings in digital banking.
- Two-factor authentication (2FA) at every login: Verify your identity via call, text, or email after entering your password every time you sign in to digital banking.
- Important: If you use Quickbooks or Quicken to get transactions from digital banking, turn this setting off.
- Push authentication: Verify your identity by responding to a push notification that is sent to your mobile device.
- Important: This setting will only be presented if you have logged into your account and registered a mobile device.
- Authenticator: Verify your identity by entering a unique code generated by the Authenticator app.
This article covers the following topics:
Mobile
If you're using a mobile device, follow the steps below. For computers, go to the desktop steps
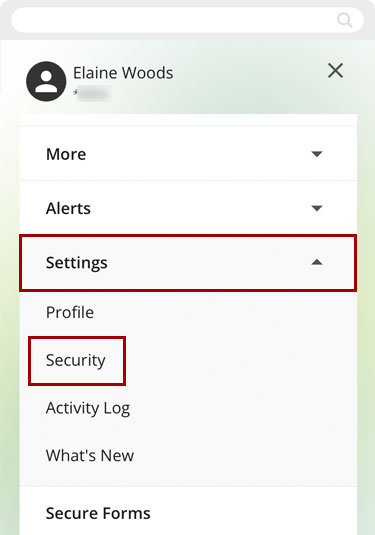
To access all of the multi-factor security options, select the Menu at bottom right.

Select Settings and tap Security.
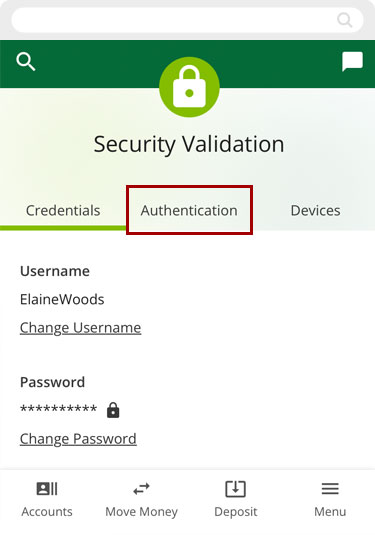
Tap Authentication.
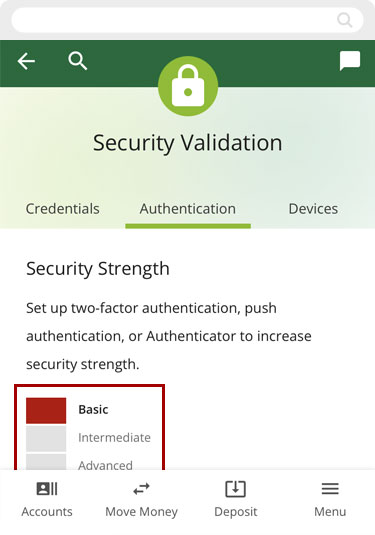
At the top of the screen, you’ll see your Security Strength.
- Basic is the strong security that already exists in digital banking
- Intermediate indicates that you have chosen an additional authentication method.
- Advanced indicates you have selected more than one additional authentication method.
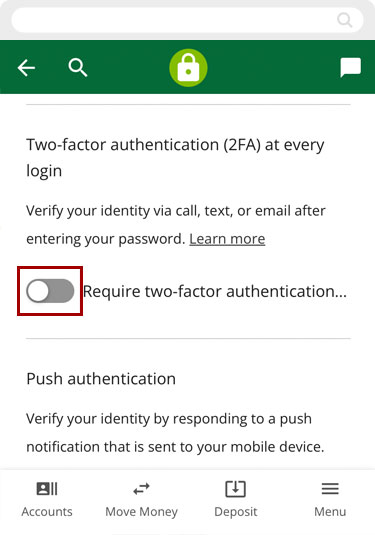
Two-factor authentication (2FA) at every login
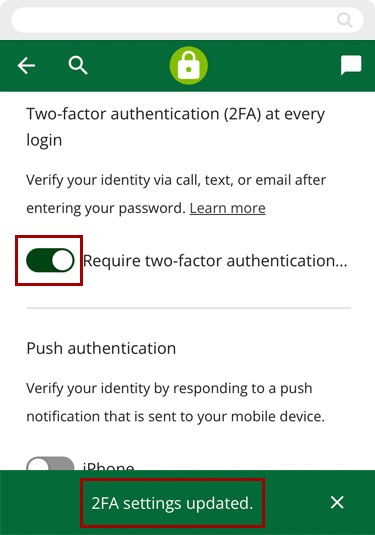
Scroll down to Two-factor authentication (2FA) at every login and tap the toggle button to turn it ON (green)
Note: If you use Quickbooks or Quicken to get transactions from digital banking, turn this setting off. Tap the toggle button again to turn it OFF (gray).
The toggle button will turn green and you will see a confirmation message letting you know the authentication is active. Your Security Strength meter will increase.
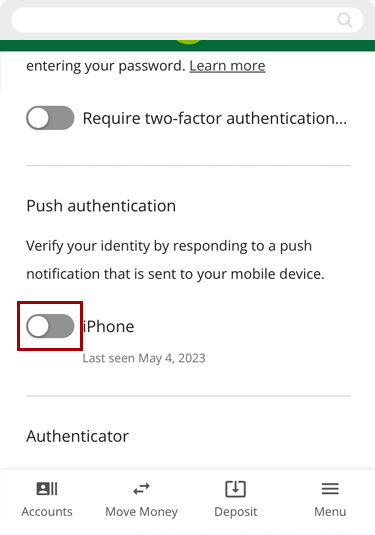
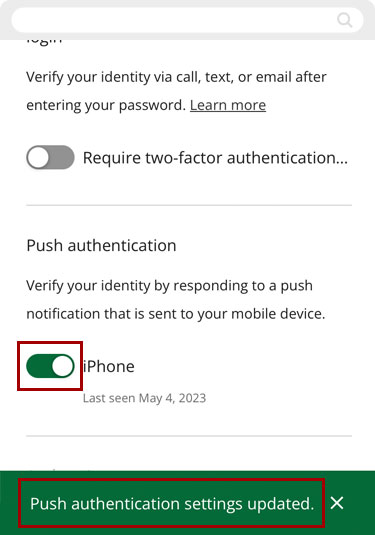
Push authentication
Scroll down to Push Notification and tap the toggle button to turn it ON (green).
Note: This setting will only be presented if you have logged into your account and registered a mobile device. Tap the toggle button again to turn it OFF (gray).
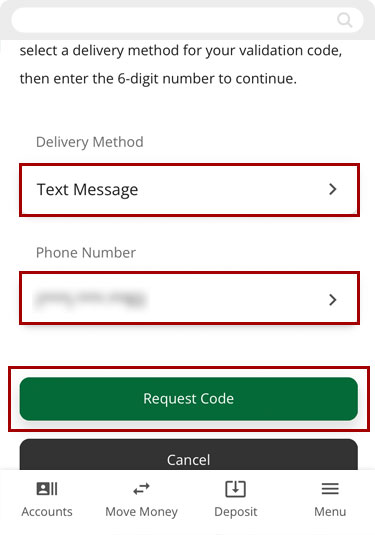
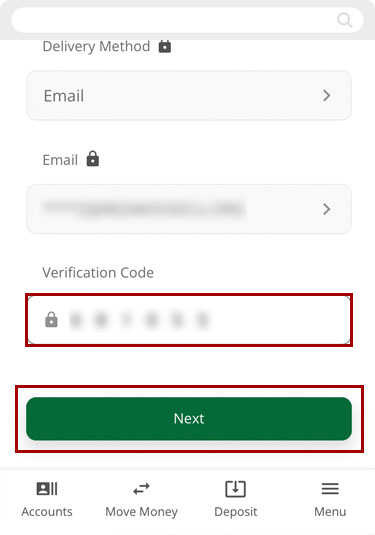
Select the Delivery Method and the email or phone number you want to use for the code. Then tap Request Code.
Note: If you select Text Message, you will be prompted to opt in to SMS notifications.
Enter the verification code you received via phone or email and tap Next.
The toggle button will turn green and you will see a confirmation message letting you know the authentication is active. Your Security Strength meter will increase.
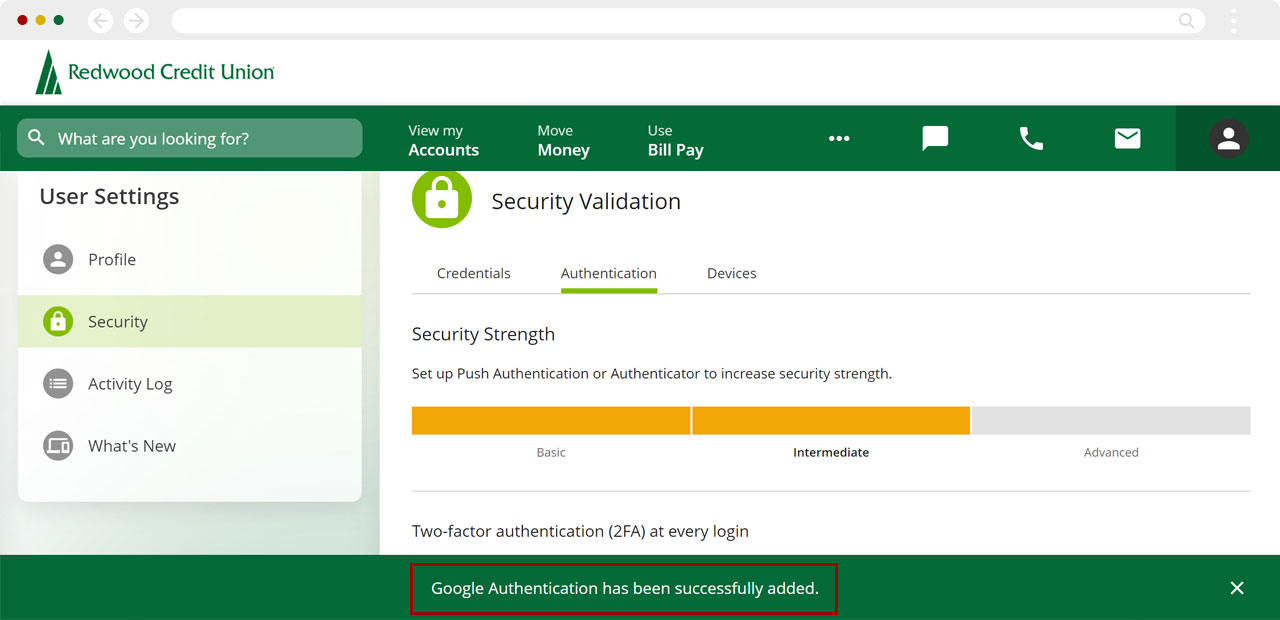
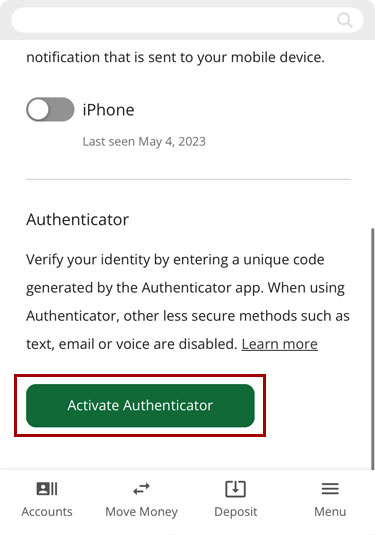
Authenticator
Important: If you choose this authentication method, you will first need to download the Google Authenticator or the Microsoft Authenticator app (if you haven’t already).
Tap the Activate Authenticator button.
Select the Delivery Method and the email or phone number you want to use to get the code. Then tap Request Code.
Note: If you select Text Message, you will be prompted to opt in to SMS notifications.
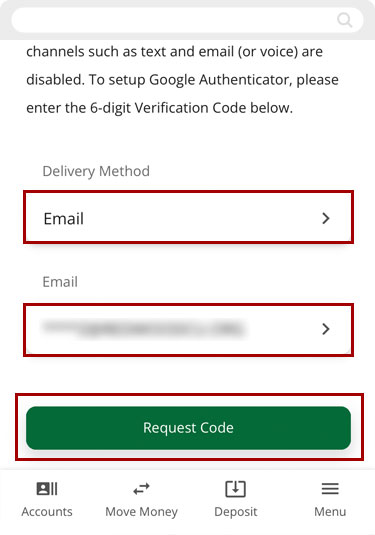
Enter the verification code you received via phone or email. Then tap Next.

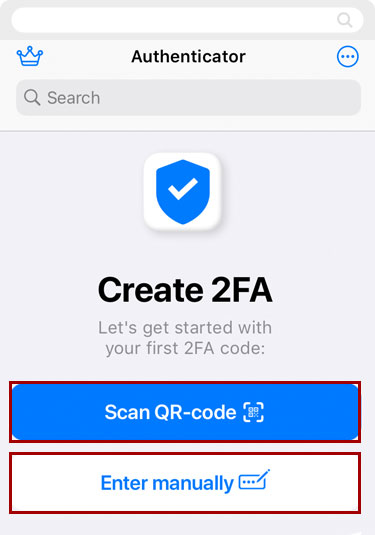
Open the Authenticator app and tap Enter manually. (Scan QR-code option does not work for mobile login.)
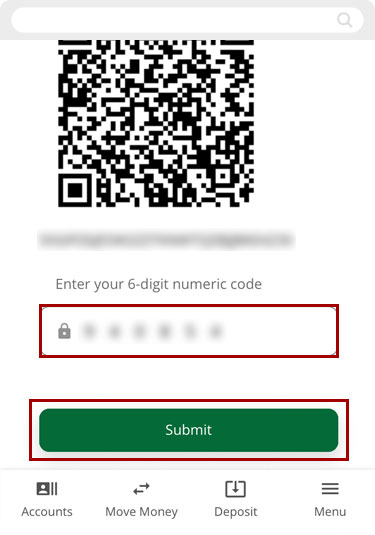
Enter the 6-digit numeric code you got from the Authenticator app and tap Submit.
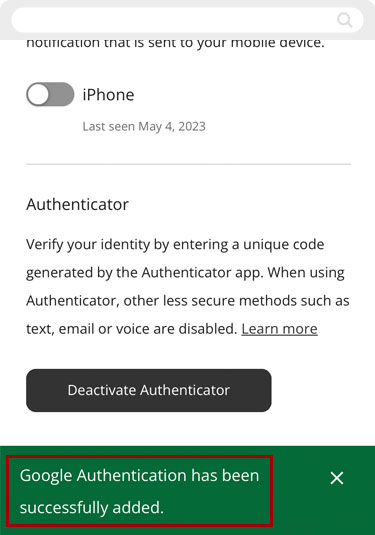
You will see a confirmation message letting you know the authentication is active. Your Security Strength meter will increase.
Desktop
If you're using a computer, follow the steps below. For mobile devices, go to the mobile steps
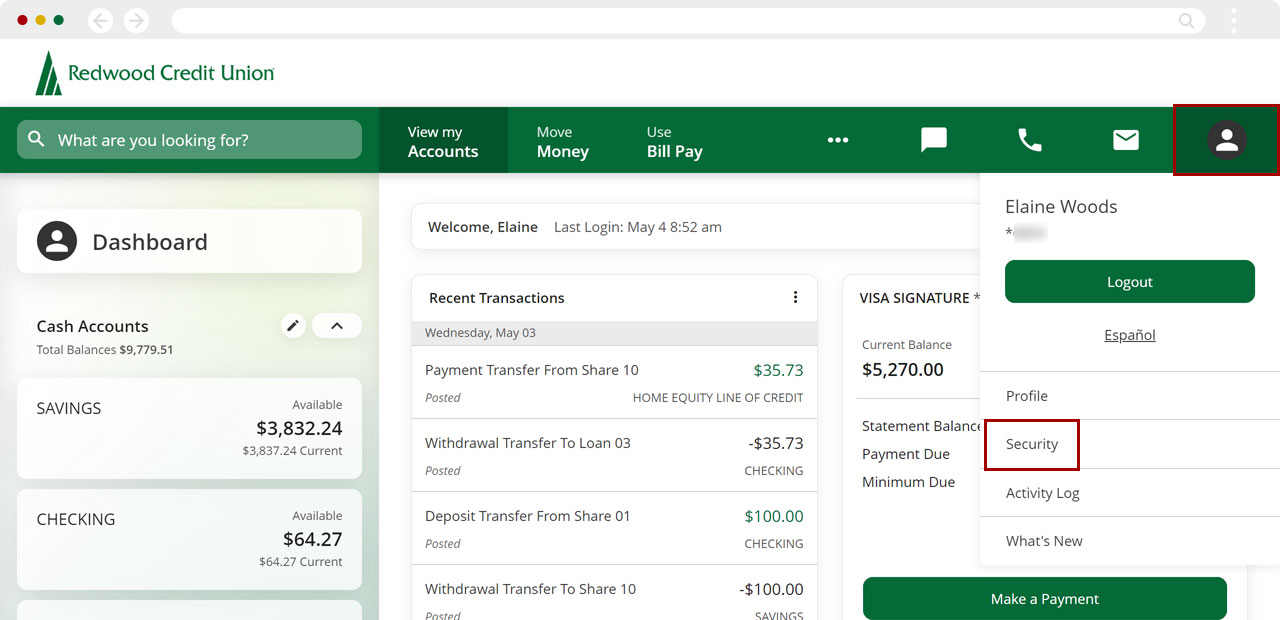
At top right, click the Profile (person) icon.
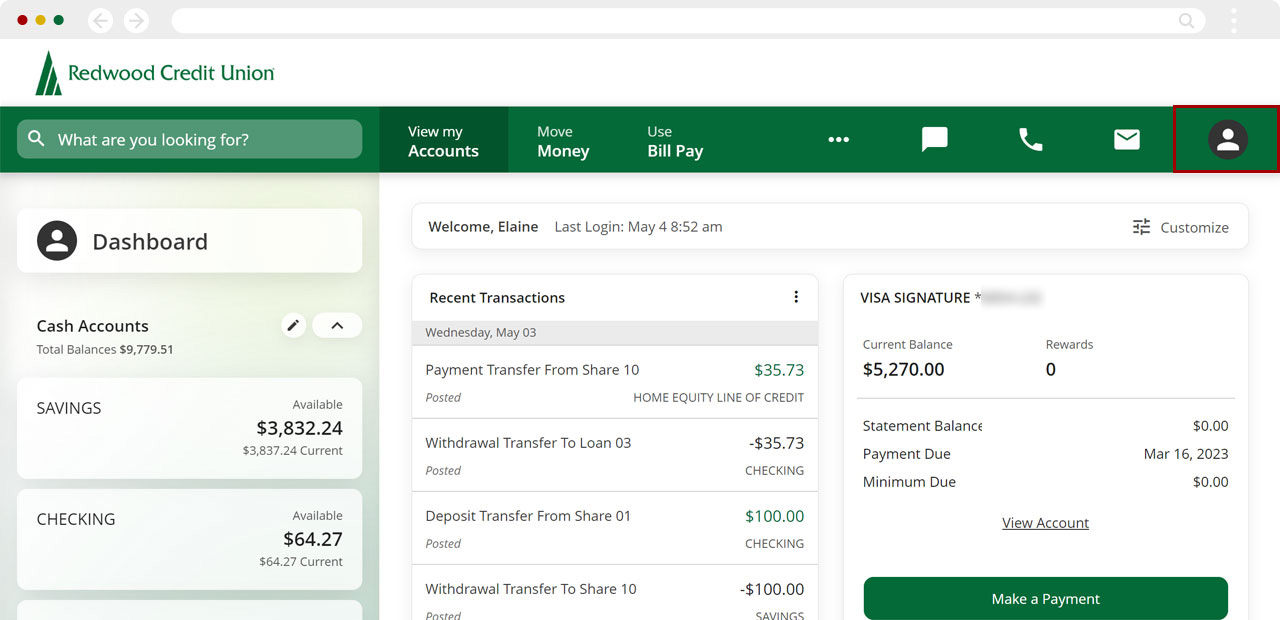
Select Security.
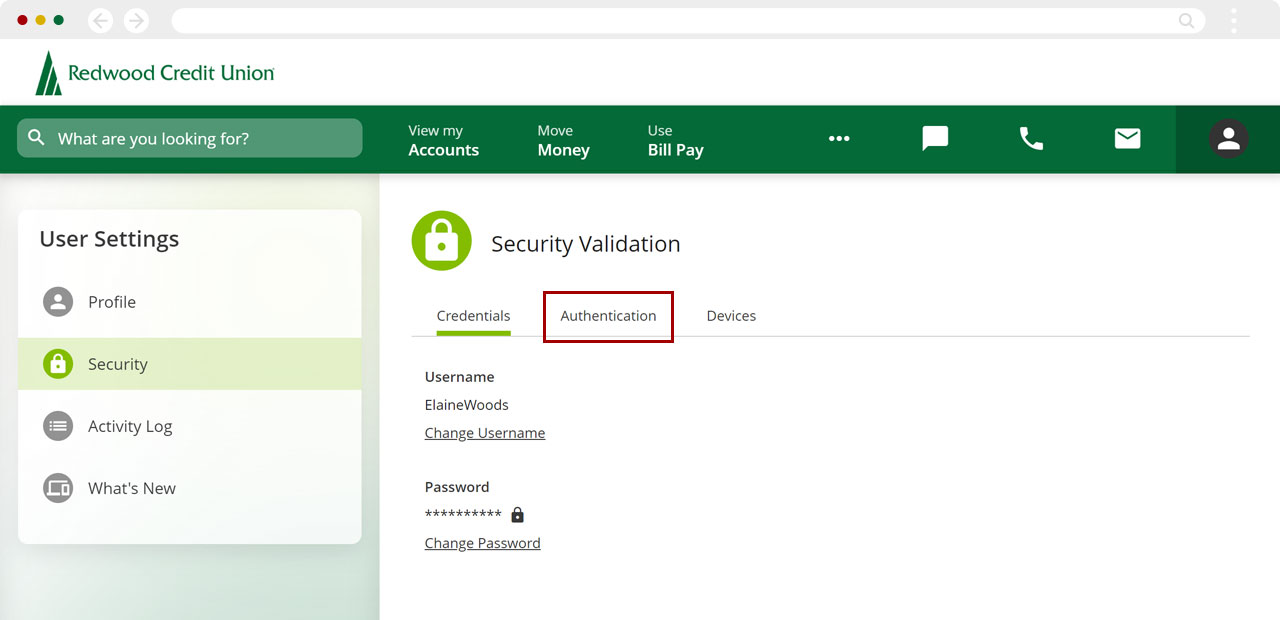
Click Authentication.
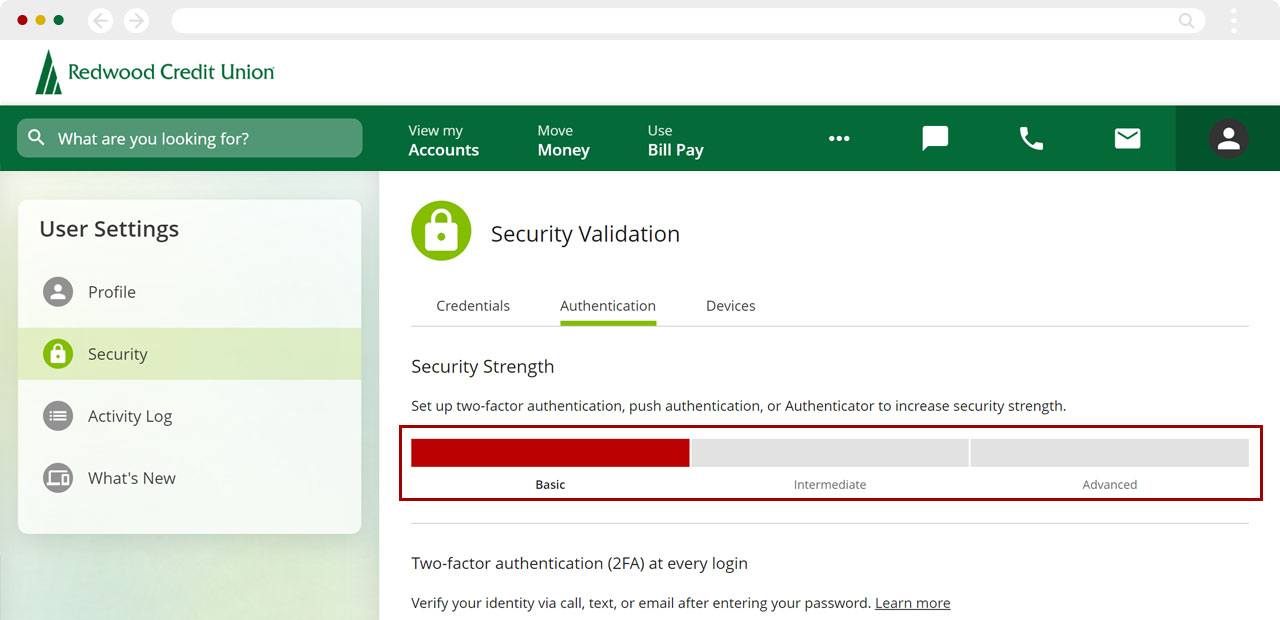
At the top of the screen, you’ll see your Security Strength.
- Basic is the strong security that already exists in digital banking
- Intermediate indicates that you have chosen an additional authentication method.
- Advanced indicates you have selected more than one additional authentication method.
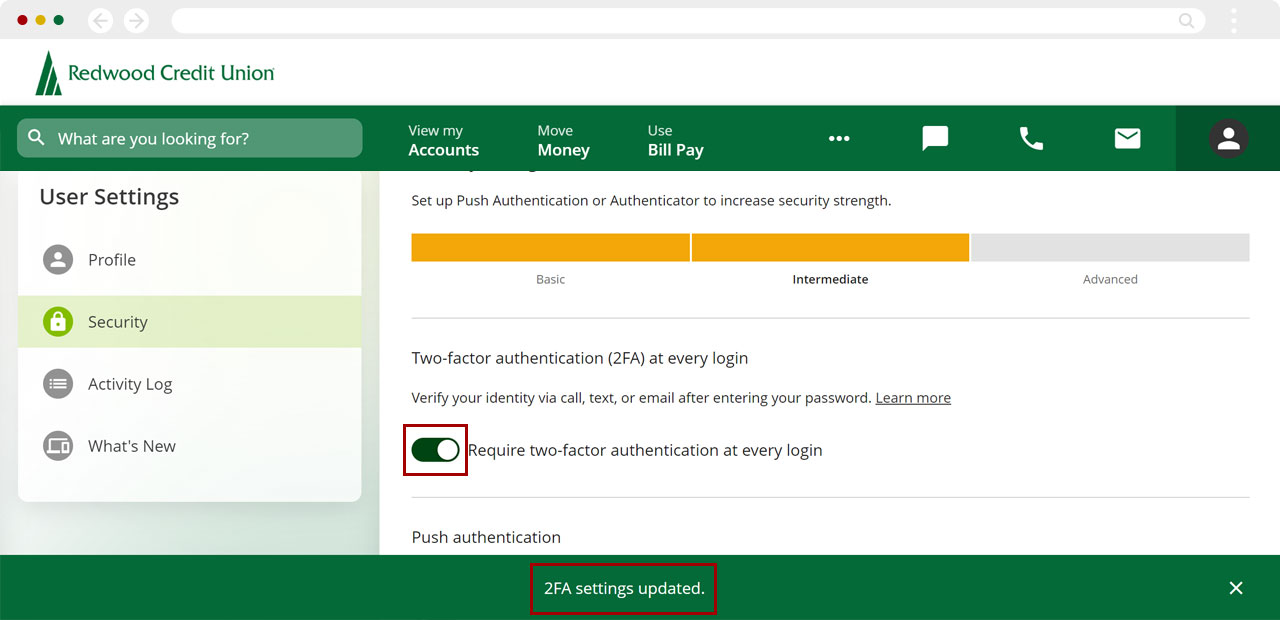
Two-factor authentication (2FA) at every login
Scroll down to Two-factor authentication (2FA) at every login and click the toggle button to turn it ON (green).
Note: If you use Quickbooks or Quicken to get transactions from digital banking, turn this setting off. Tap the toggle button again to turn it OFF (gray).
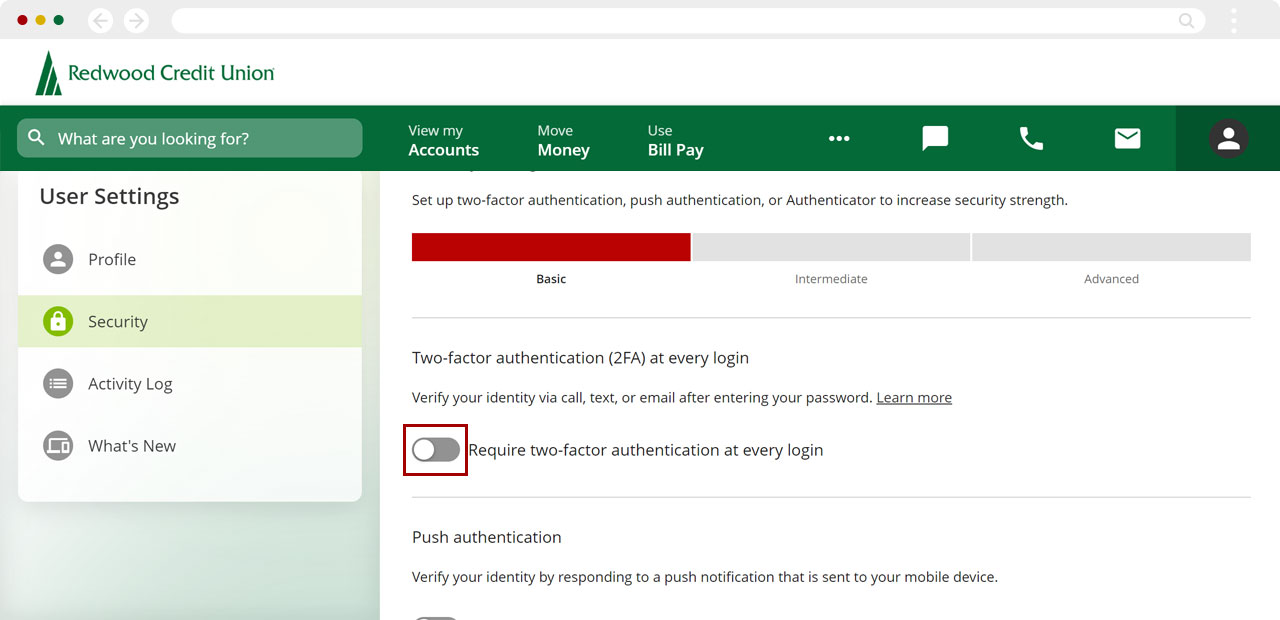
You will see a confirmation message letting you know the authentication is active. Your Security Strength meter will increase.
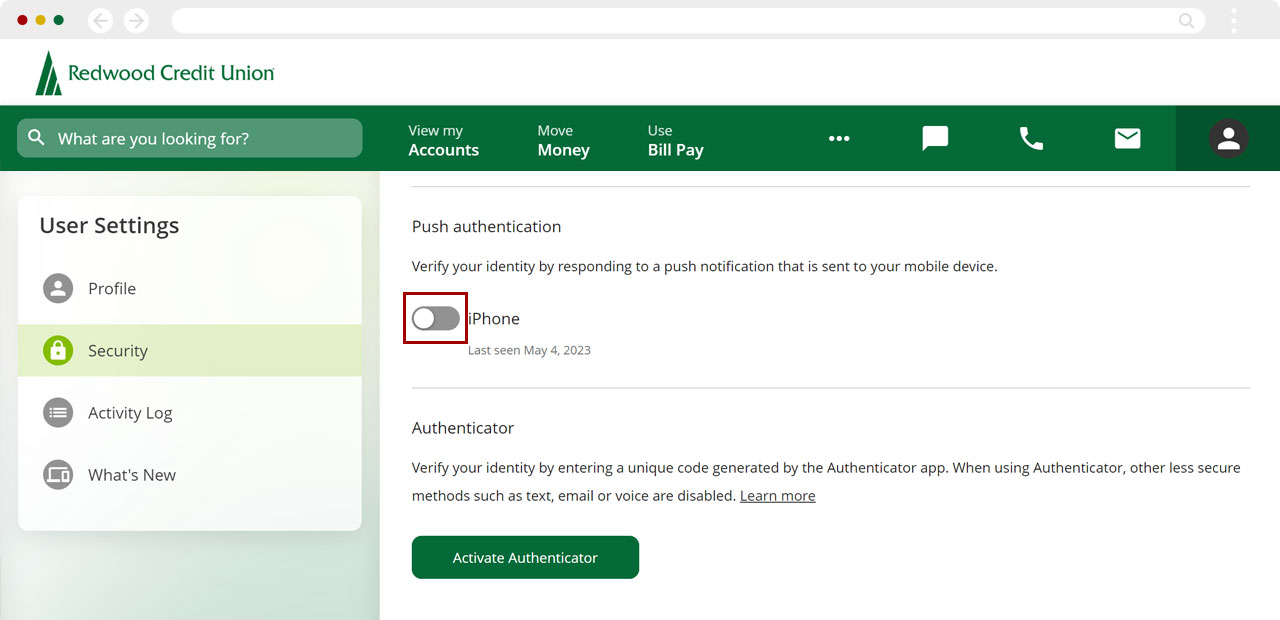
Push authentication
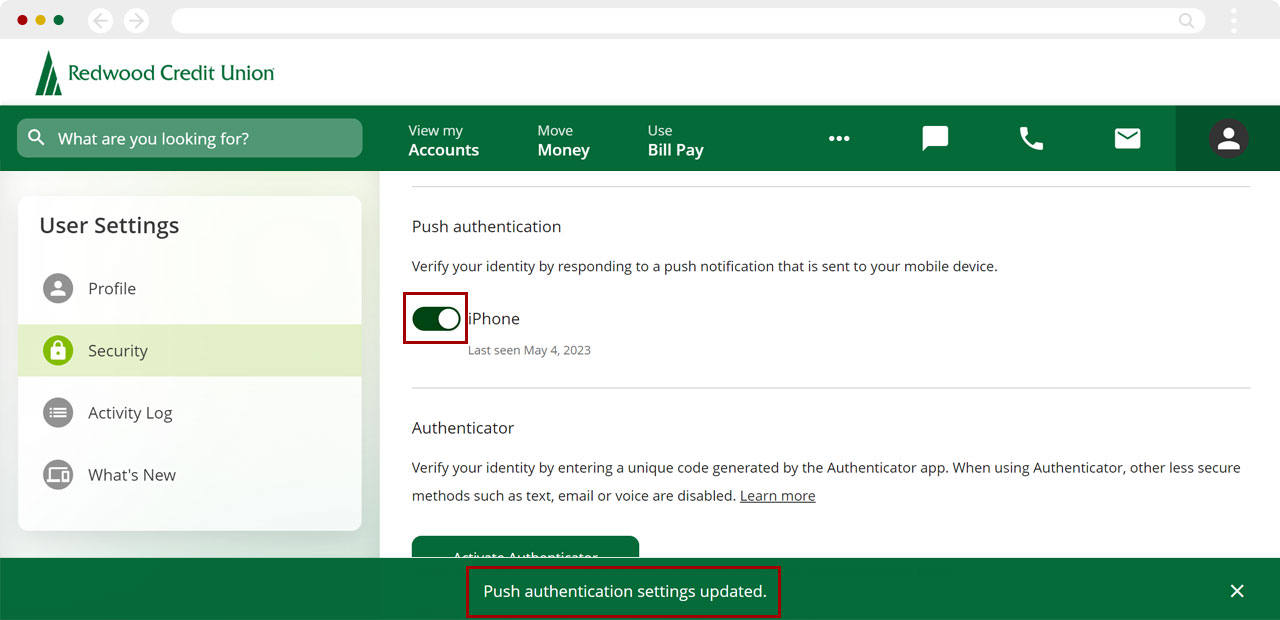
Scroll down to Push authentication and click the toggle button to turn it ON (green).
Note: This setting will only be presented if you have logged into your account and registered a mobile device. Tap the toggle button again to turn it OFF (gray).
You will see a confirmation banner letting you know the authentication is active, and your Security Strength meter will increase.
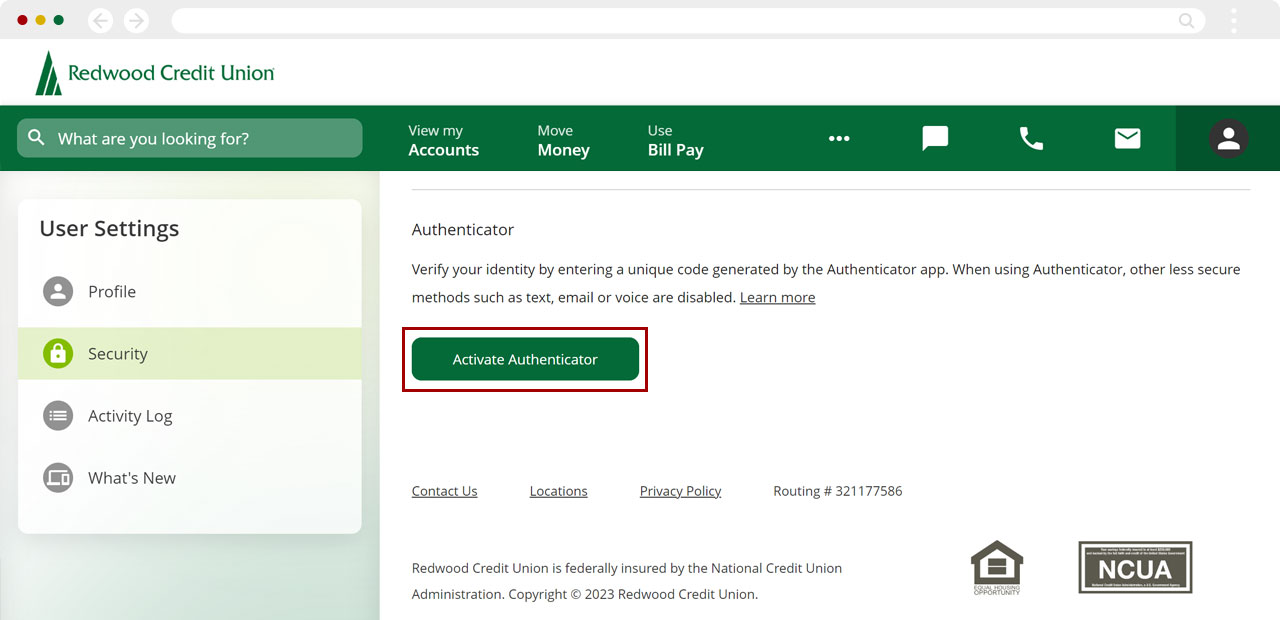
Authenticator
Important: If you choose this authentication method, you will first need to download the Google Authenticator or the Microsoft Authenticator app (if you haven’t already).
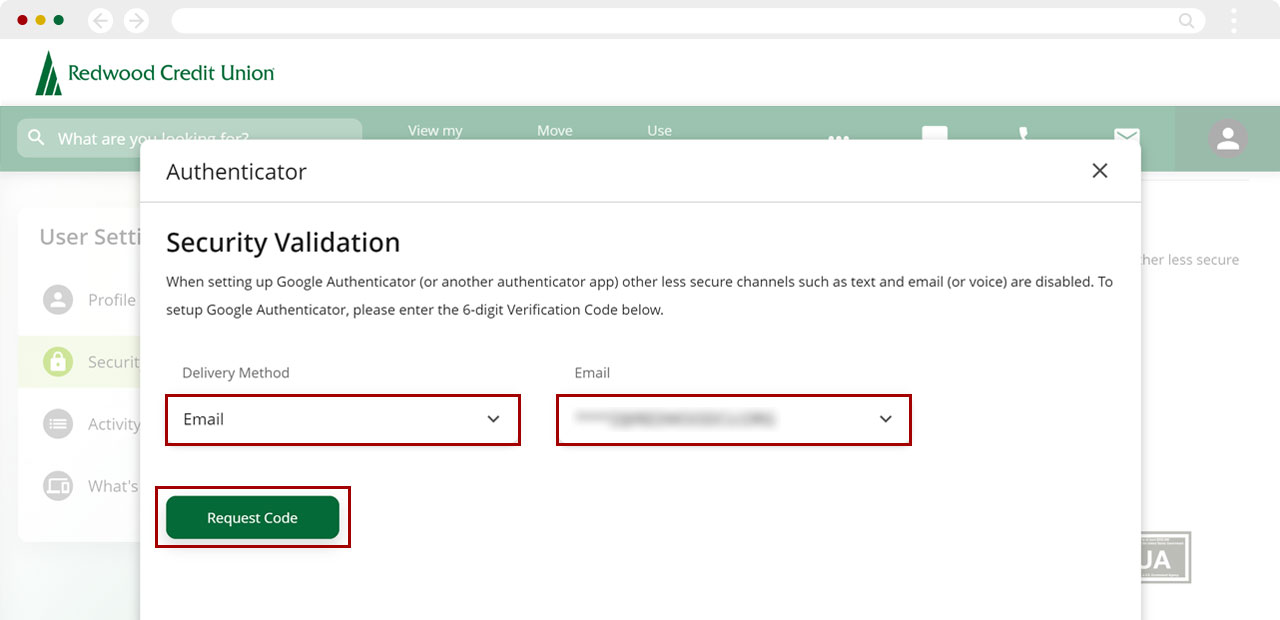
Scroll down to Authenticator and click Activate Authenticator.
Select the Delivery Method and the email or phone number you want to use to get the code. Then click Request Code.
Note: If you select Text Message, you will be prompted to opt into SMS notifications.
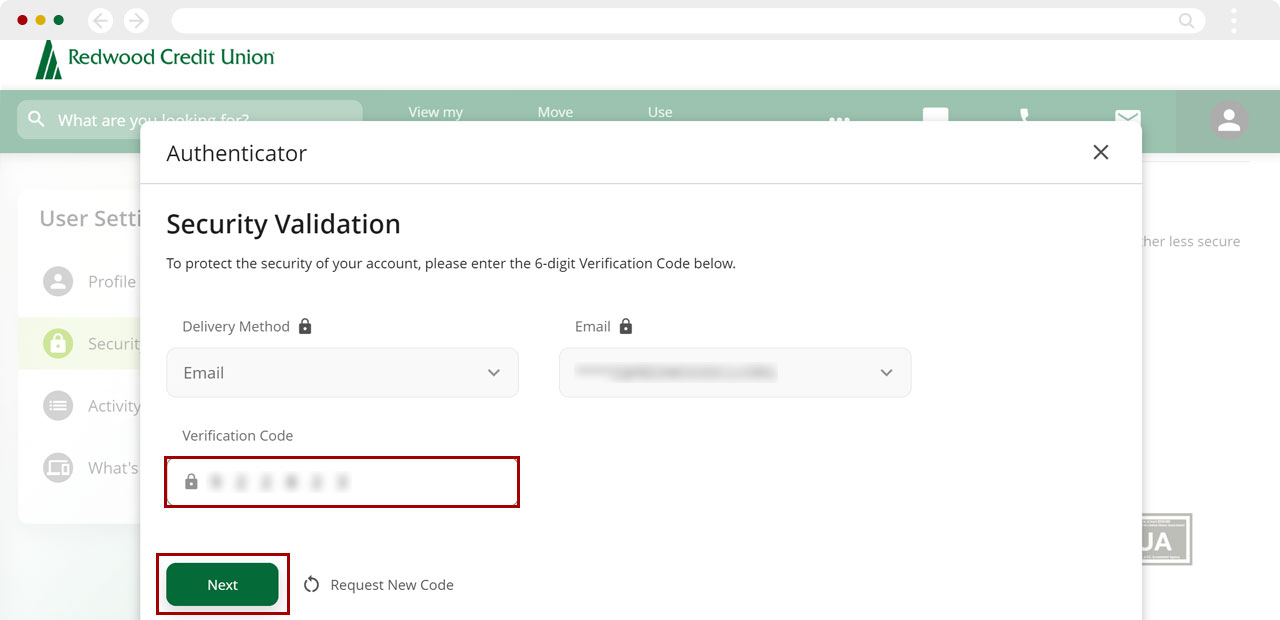
Enter the Verification Code you received via phone or email and click Next.
On your phone, open the Authenticator app, and select whether you want to Scan QR-Code or Enter manually.
Enter the 6-digit numeric code you got from the Authenticator app.
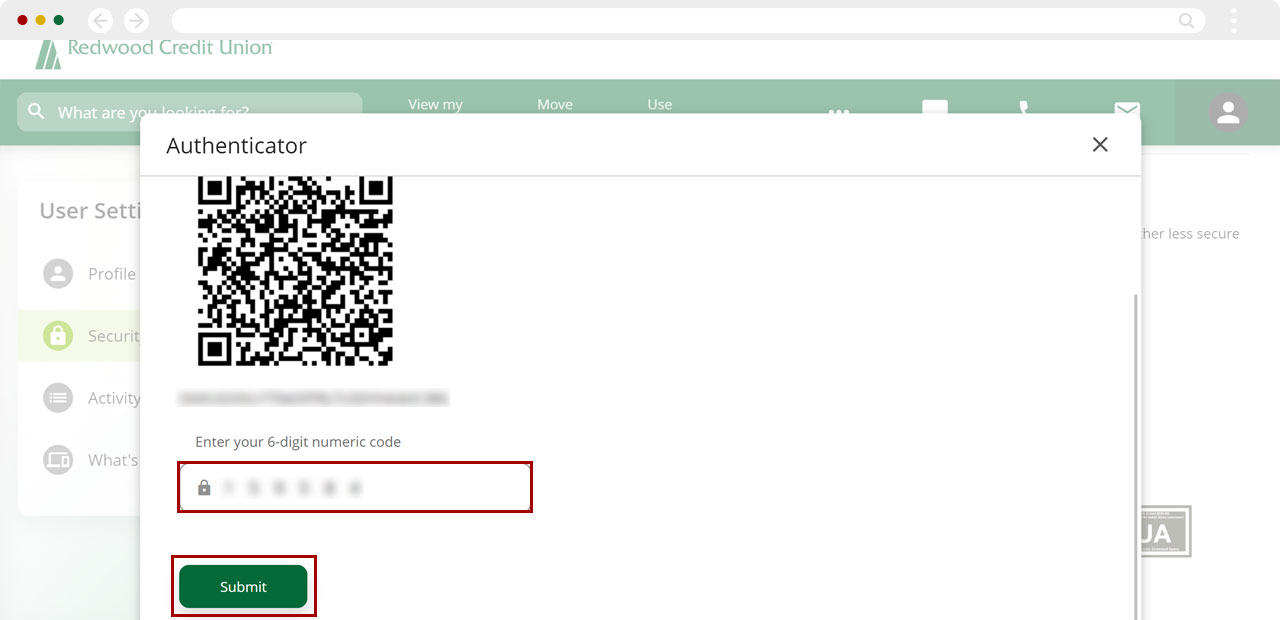
You will see a confirmation message letting you know the authentication is active, and your Security Strength meter will increase.