
Bill Center: How to create a group
This article covers steps for the updated Bill Center experience. If you are still using the previous version of Bill Pay, go to Bill Pay: Setting Up Groups and Making Changes.
With Bill Center, you can organize billers into groups.
Mobile
If you're using a mobile device, follow the steps below. For computers, go to the desktop steps
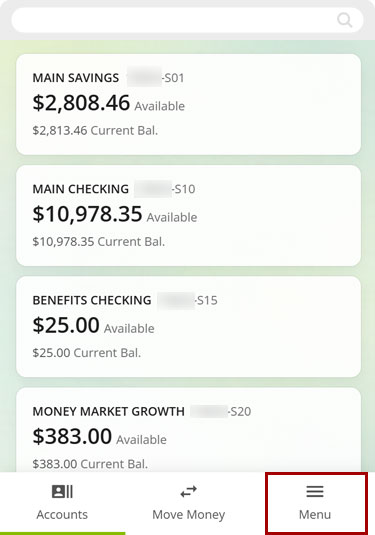
At bottom right, select the Menu.
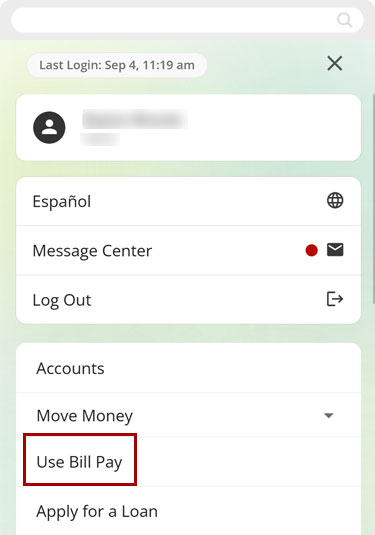
Select Use Bill Pay.
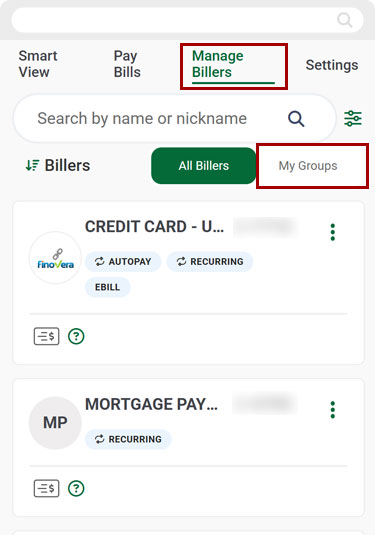
Select Manage Billers, then select My Groups.
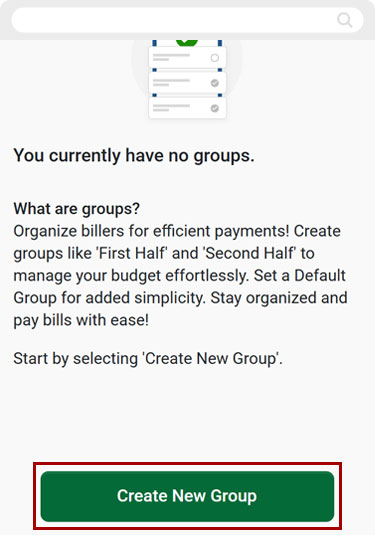
Select Create New Group.
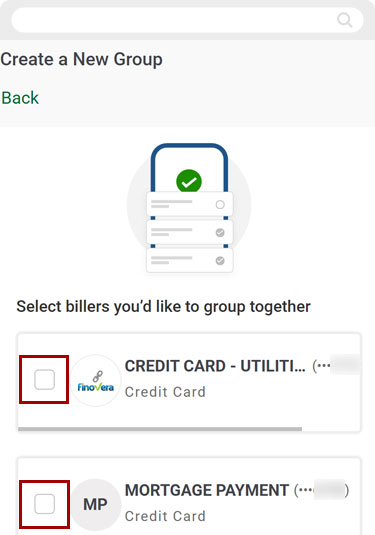
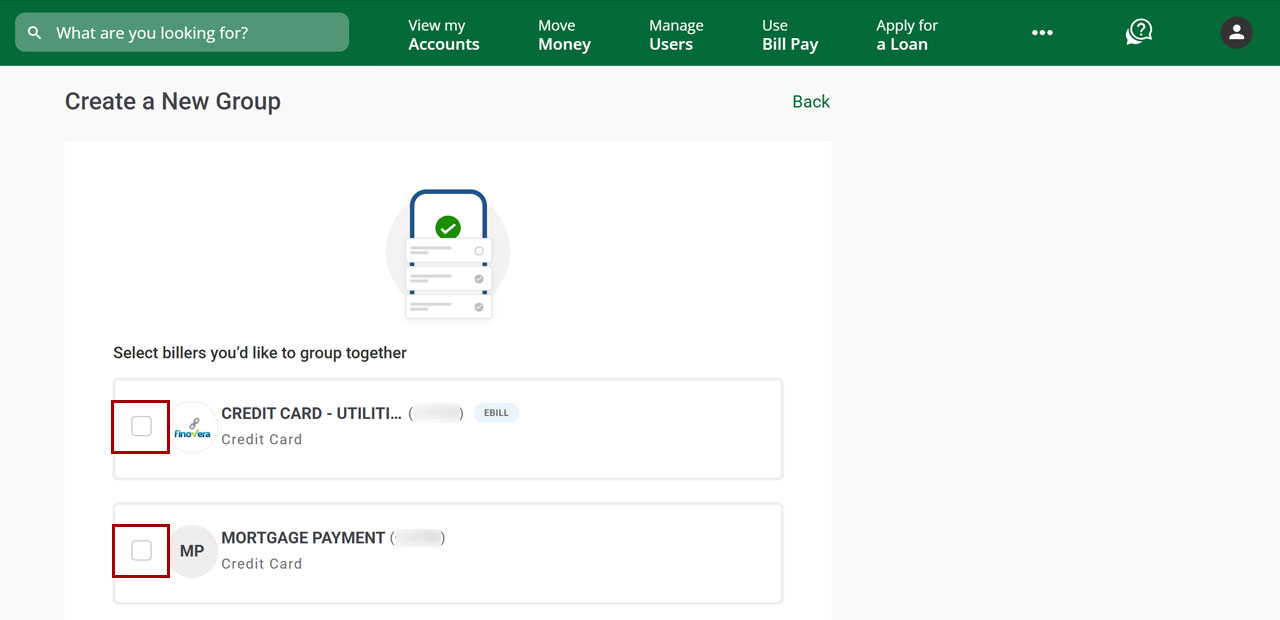
Select the billers you want to group together.
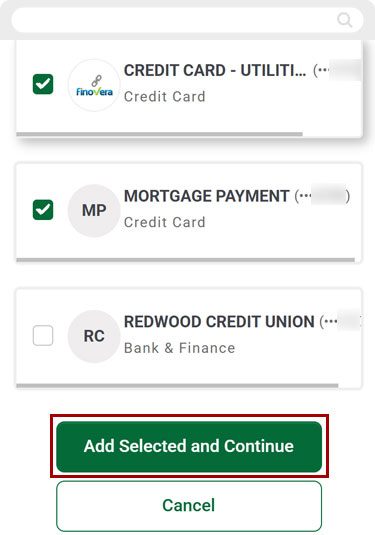
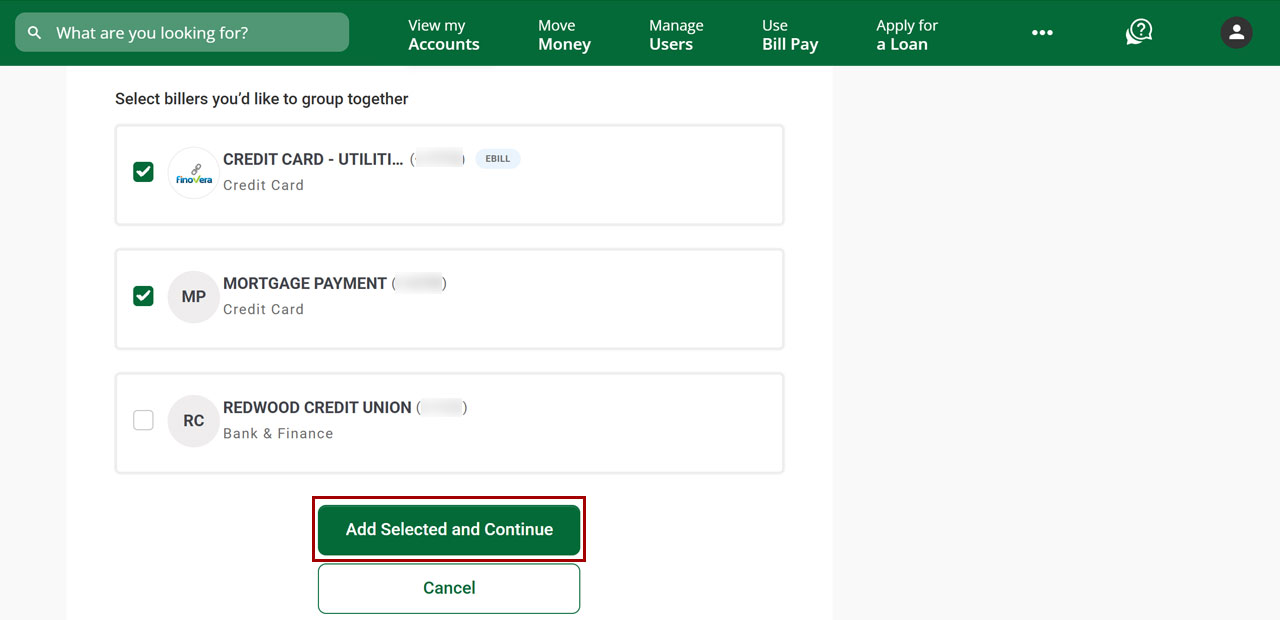
Select Add Selected and Continue.
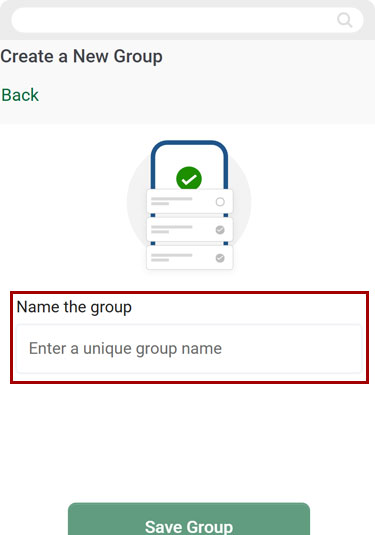
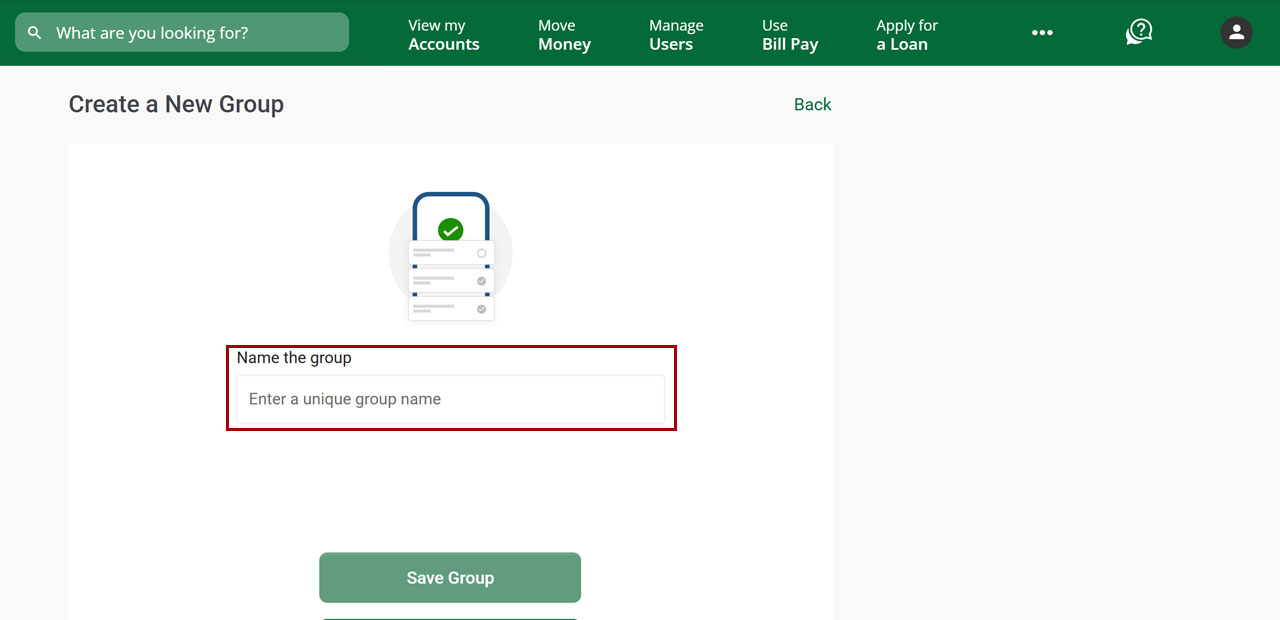
Enter a unique group name in the Name the Group field.
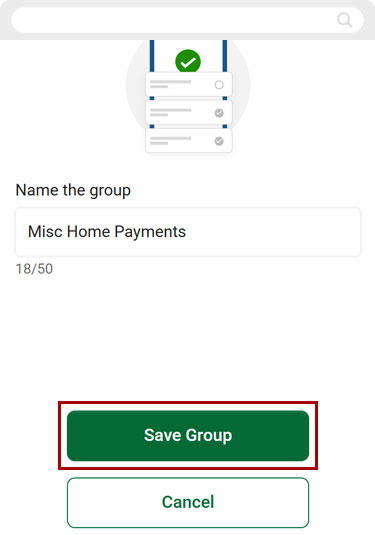
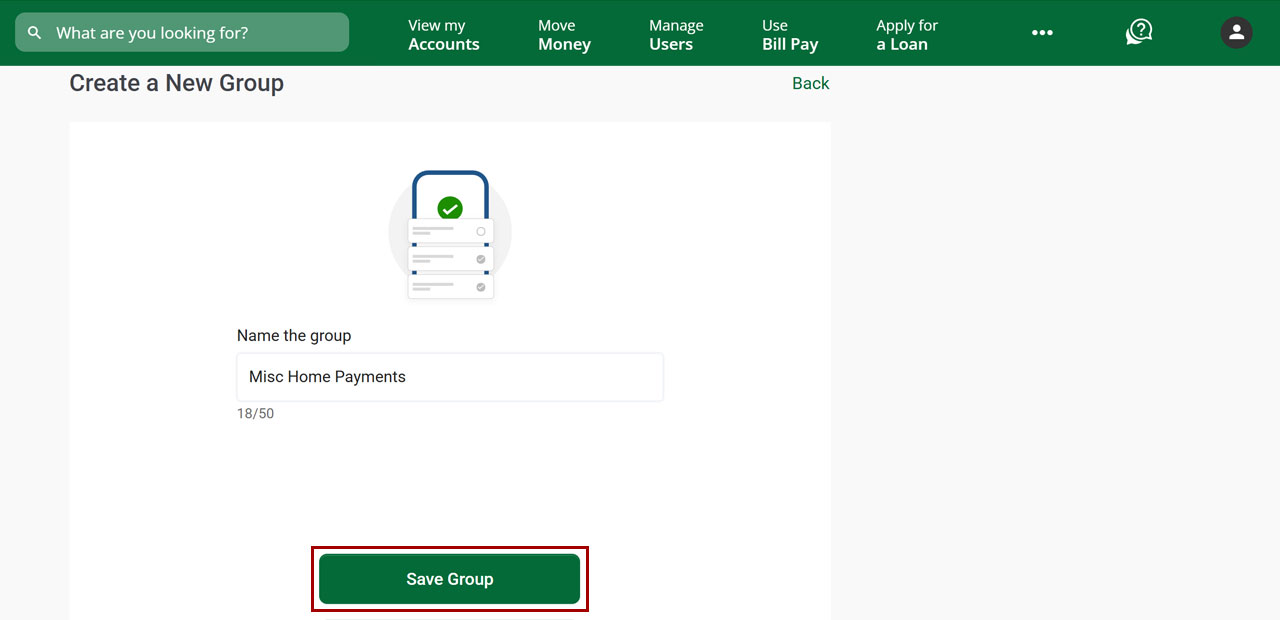
Select Save Group.
Select Done to return to Manage Billers.
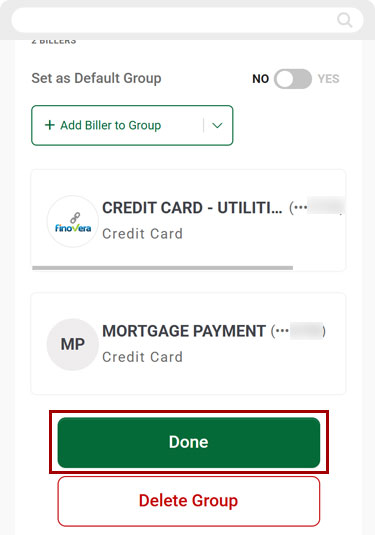
You will see a banner confirming the new group was successfully created.

Desktop
If you're using a computer, follow the steps below. For mobile devices, go to the mobile steps
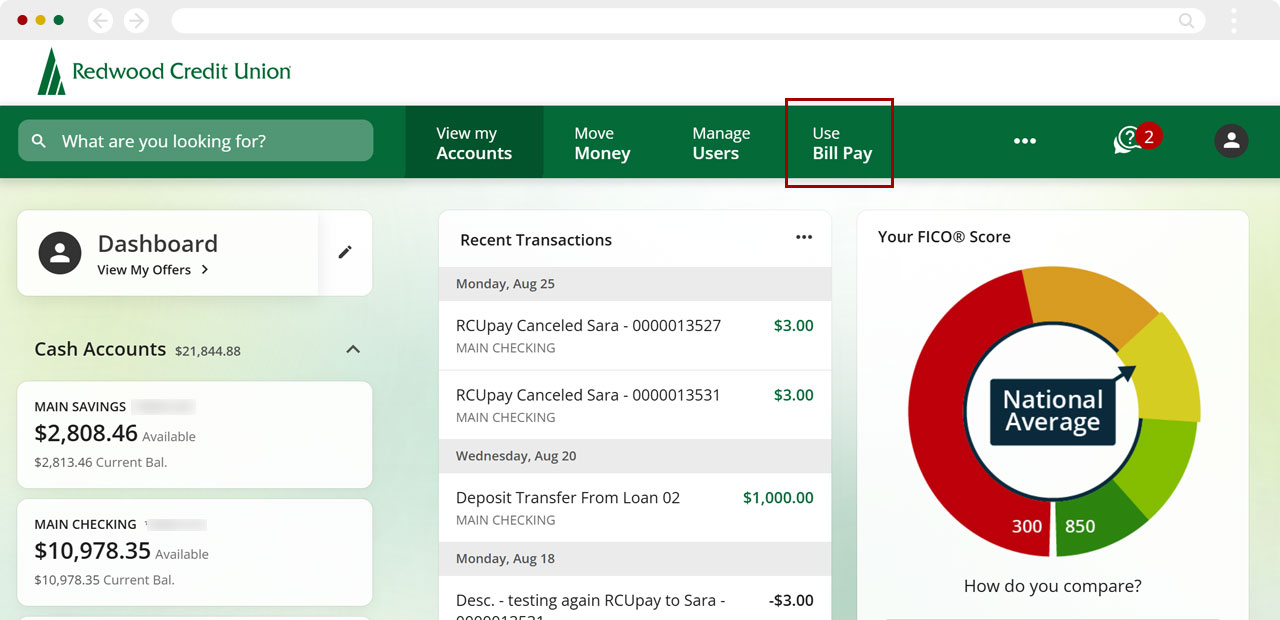
From the top menu, select Use Bill Pay.
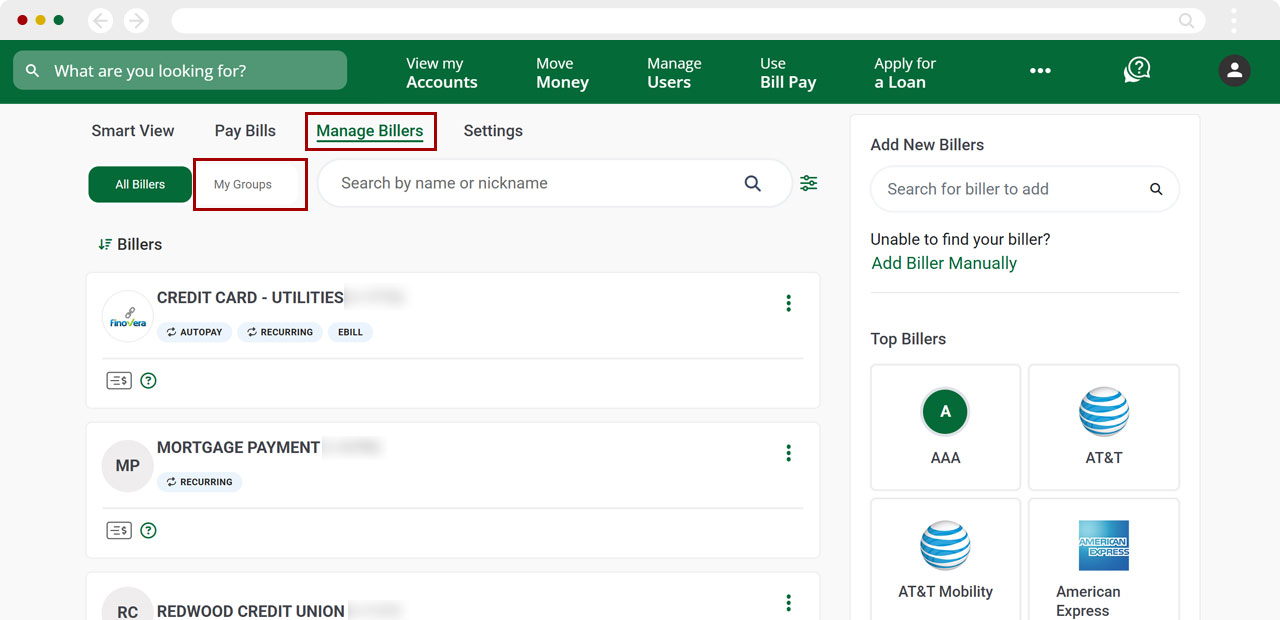
Select Manage Billers, then select My Groups.
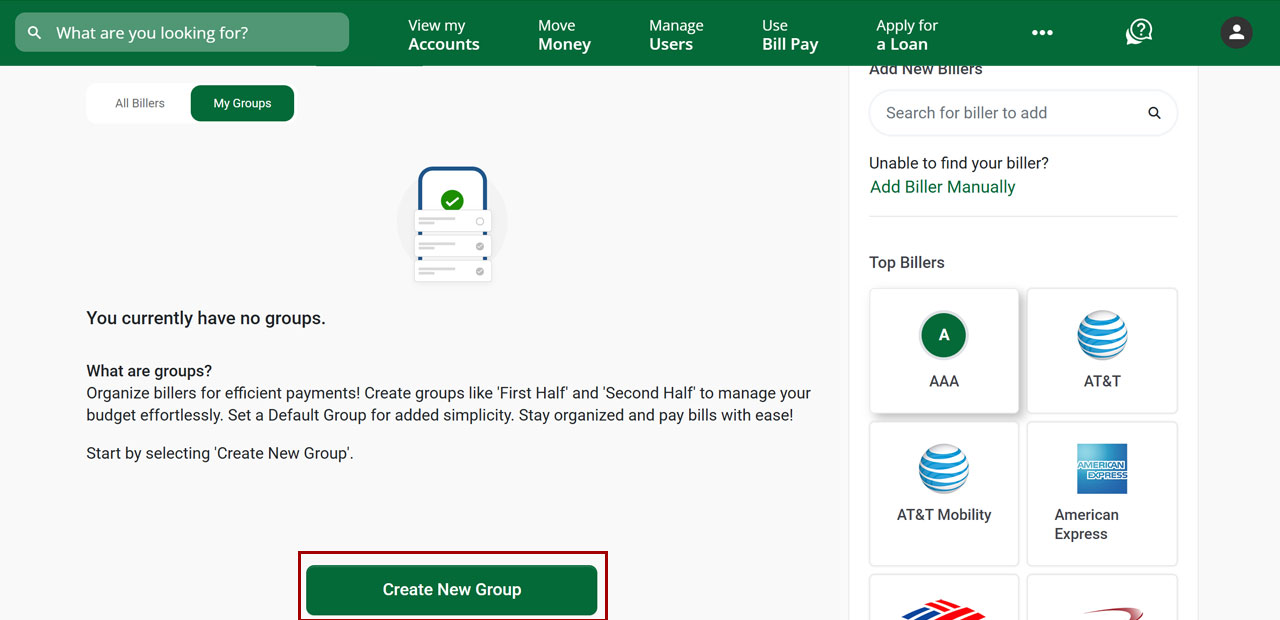
Select Create New Group.
Select the billers you want to group together.
Select Add Selected and Continue.
Enter a unique group name in the Name the Group field.
Select Save Group.
Under Notifications at the right, you will see a banner confirming the new group was successfully created. Select Done to return to Manage Billers.
.jpg)
