Business ACH Services: How to Add, Edit, or Delete a Template
A template is the “wrapper” around an individual or group of recipients, used to process transactions.
To process a template/file, you must create a template, add recipients, and approve it before you can schedule transactions.
Example: ABC Inc. has 15 employees and each employee has direct deposit. The company creates a template called “Payroll,” then adds each employee under Recipients. Company enters the amount for each recipient in the template and schedules it. Once scheduled, the business must go to the Approval page and approve the request. The template will then be listed under Scheduled.
This article covers the following topics:
To schedule a template, review our article How to schedule a template.
To add recipients to templates, review our article How to add recipients to a template.
Mobile
If you're using a mobile device, follow the steps below. For computers, go to the desktop steps
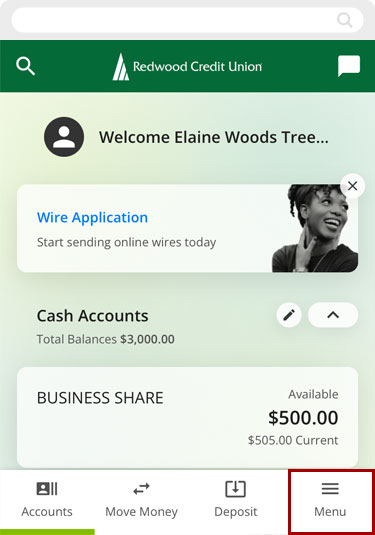
Select Menu at bottom right.
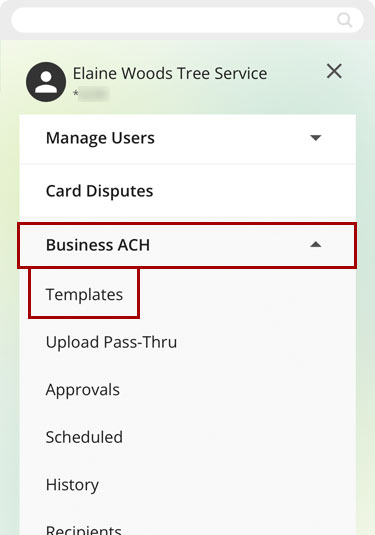
Tap Business ACH and select Templates.
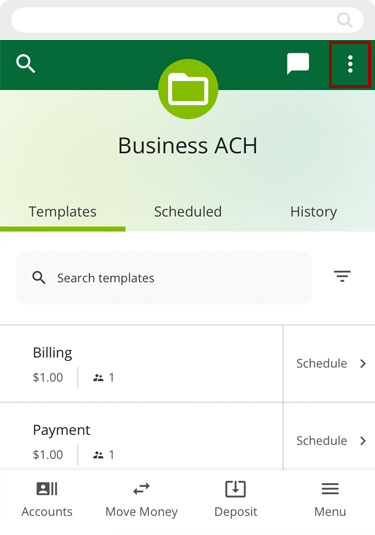
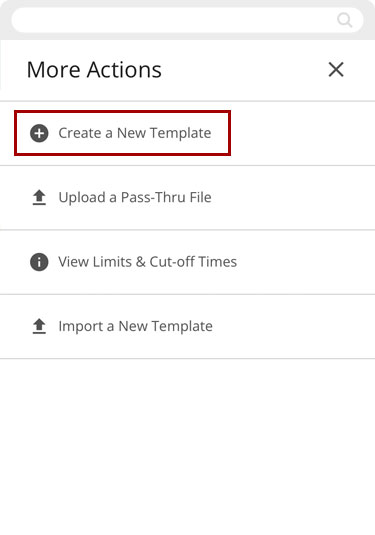
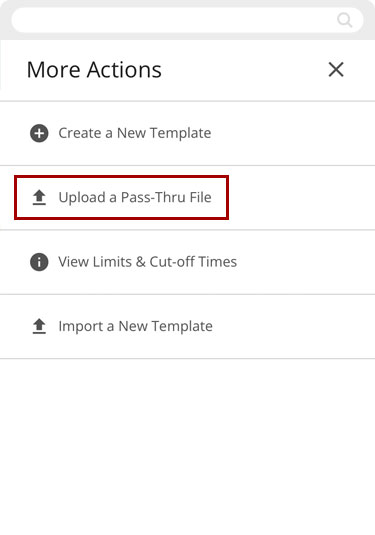
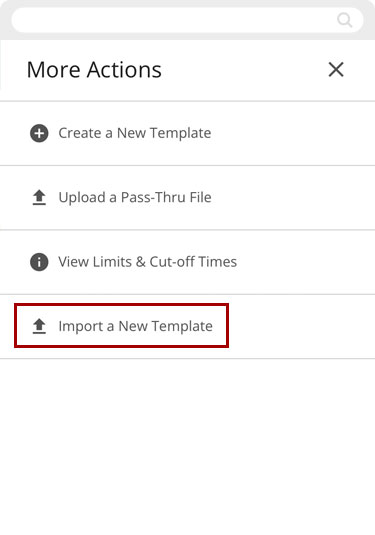
Tap the three horizontal dots at top right to open the More Actions menu.
You can create a new template from scratch, import a new template, or upload a pass-thru file.

Create a New Template
Tap Create a New Template.
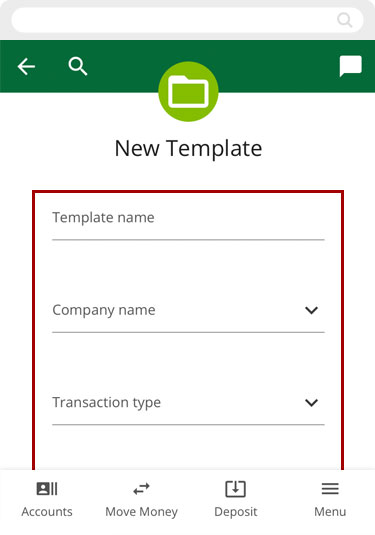
Complete the New Template details:
- Enter a Template Name.
- Select the Company Name from the drop-down menu.
- Select the Transaction Type (SEC code) to identify the transaction.
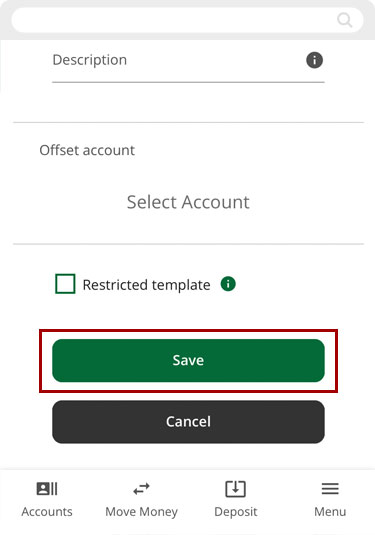
- Enter a template Description (Payroll, Billing, etc.)
- Choose the RCU offset account.
- If you wish to make it a restricted template, check the box.
Note: Restricted templates can only be used by sub-users with roles allowing access to restricted templates. A restricted template means that others who do not have that access will not see the template. An example would be a holiday bonus.
Once you have completed all the fields, tap Save.
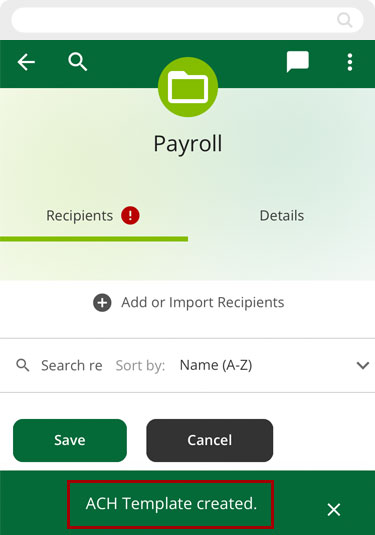
You will see a message confirming your template was created.
Note: The red exclamation point indicates you need to add a recipient to the template.
Upload a Pass-Thru File
Tap the three horizontal dots at top right to open the More Actions menu, and select Upload a Pass-Thru File.
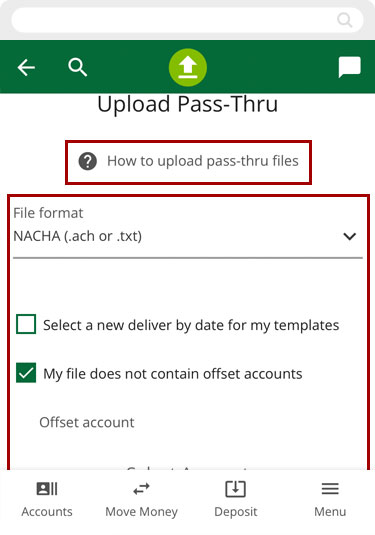
Select the deliver by date (if needed), file format, and offset account. Then upload the file and follow the prompts.
Note: For more information, tap How to upload pass thru files at the top.
Import a New Template
Tap the three horizontal dots at top right to open the More Actions menu and select Import a New Template.
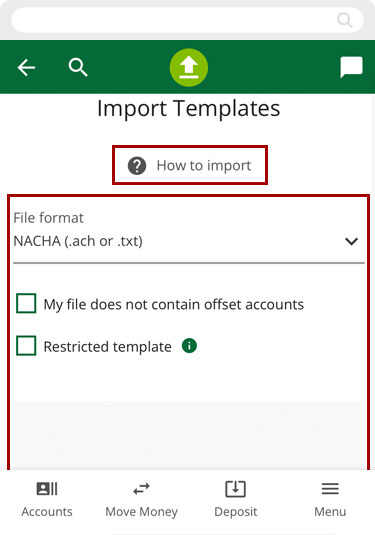
Select the deliver by date (if needed), file format, and offset account. Then upload the file and follow the prompts.
Note: For more information, click How to import at the top.
Edit Templates
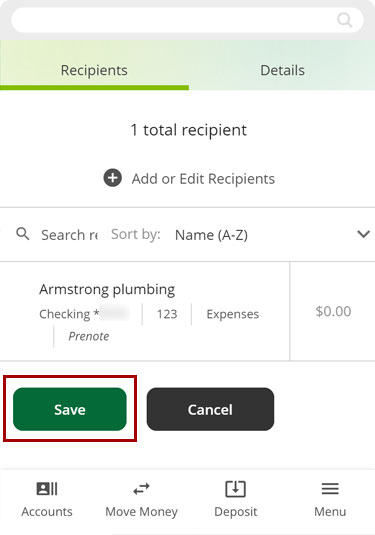
From the Templates screen, select the template you want to edit.

Adjust the template and tap Save.
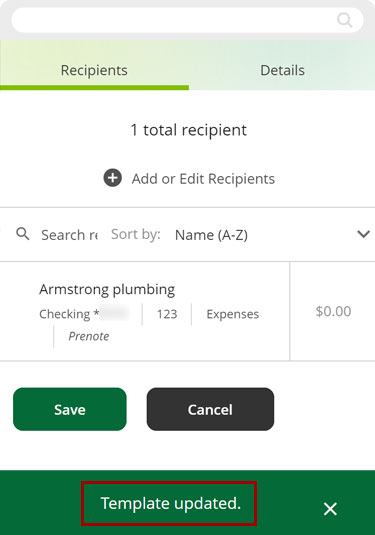
You will see a message confirming the template was updated.
Delete Templates
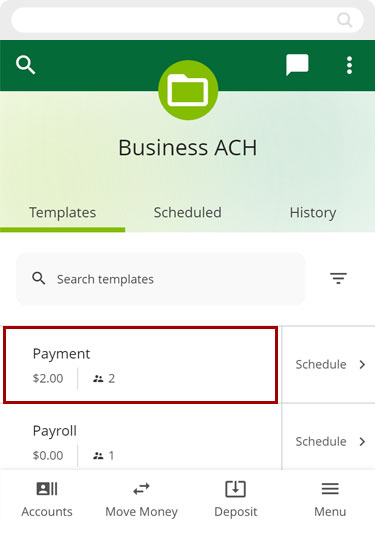
From the Templates screen, tap the template you want to edit.
Tap the three horizontal dots at top right to open the More Actions menu and select Delete.
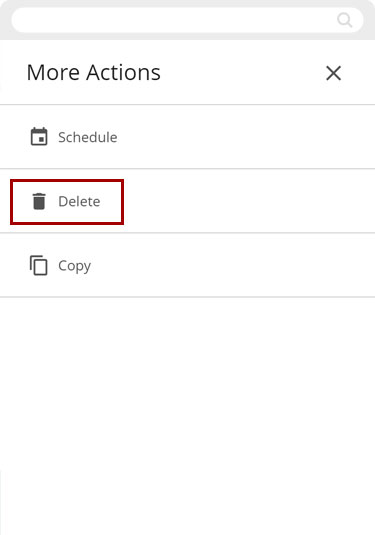
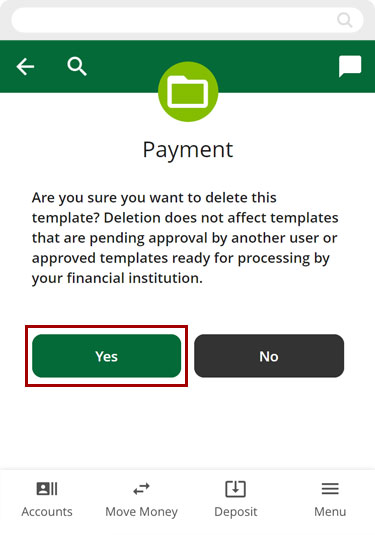
You will see a confirmation screen. Tap Yes to delete the template.
Important: Deletion does not affect templates that are pending approval by another user or approved templates ready for processing by your financial institution.
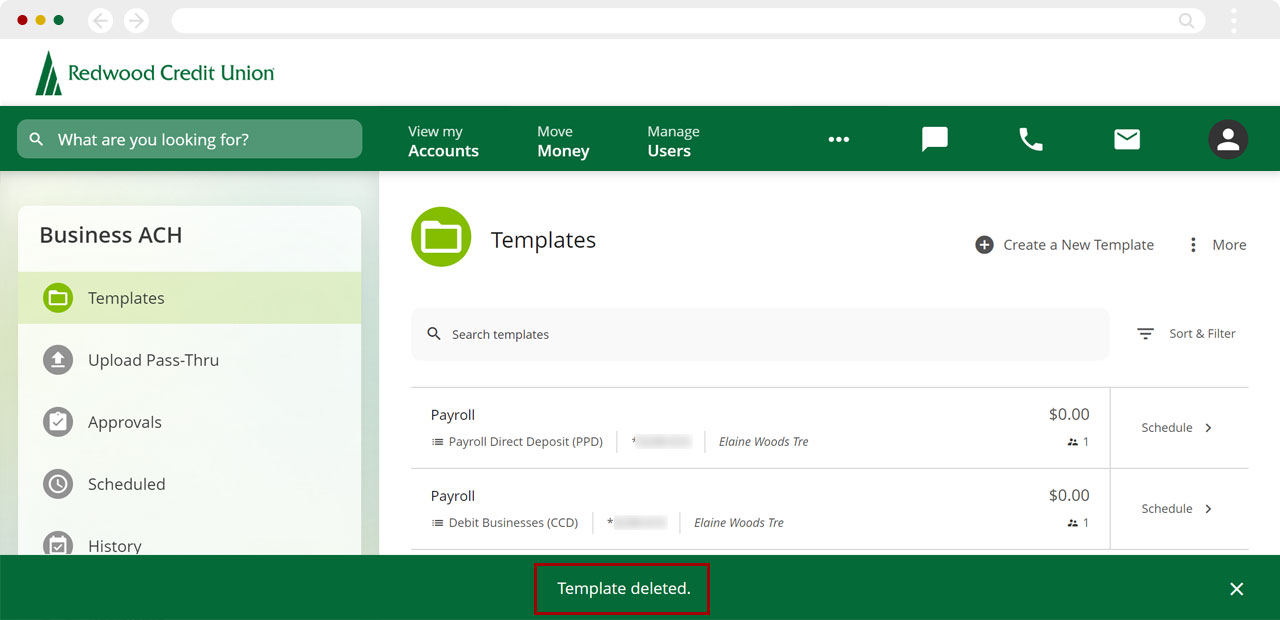
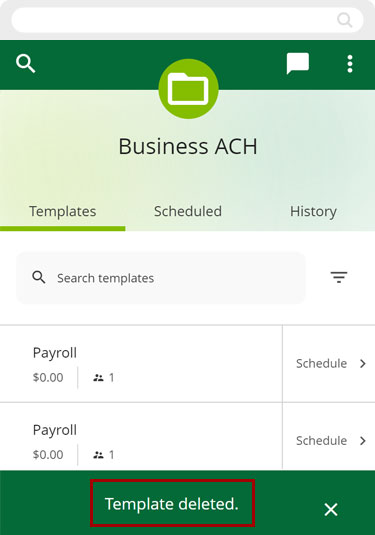
You will see a message confirming the template was deleted.
Desktop
If you're using a computer, follow the steps below. For mobile devices, go to the mobile steps
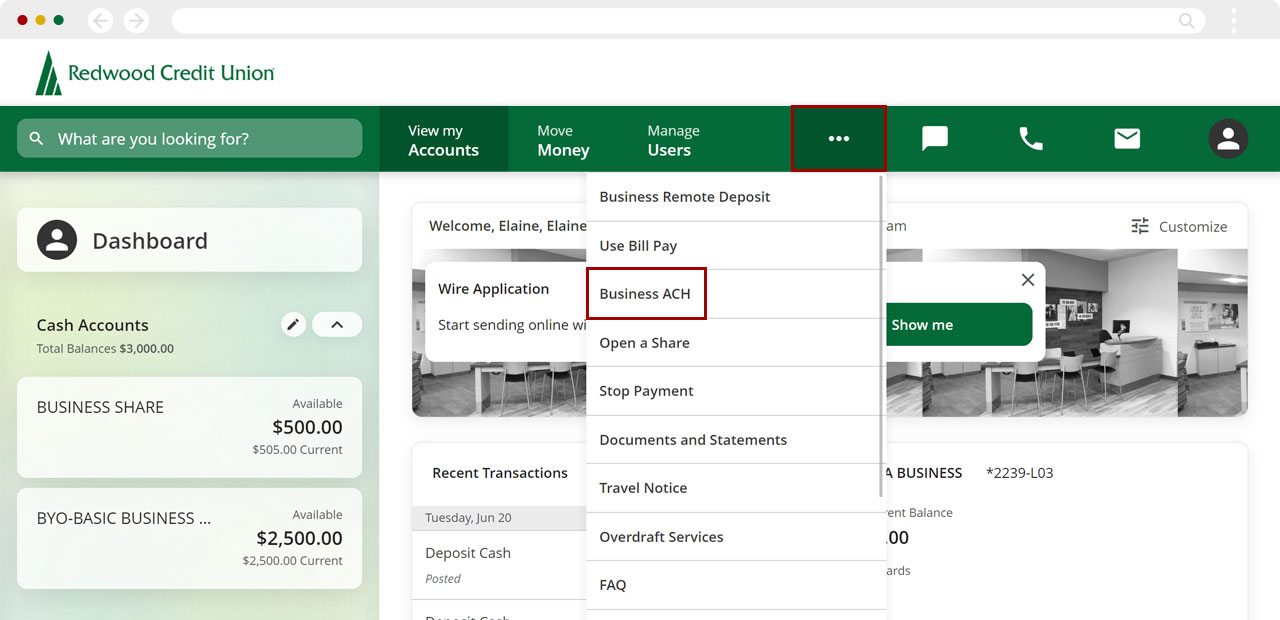
Click the three dots (...) to open the More menu and select Business ACH.
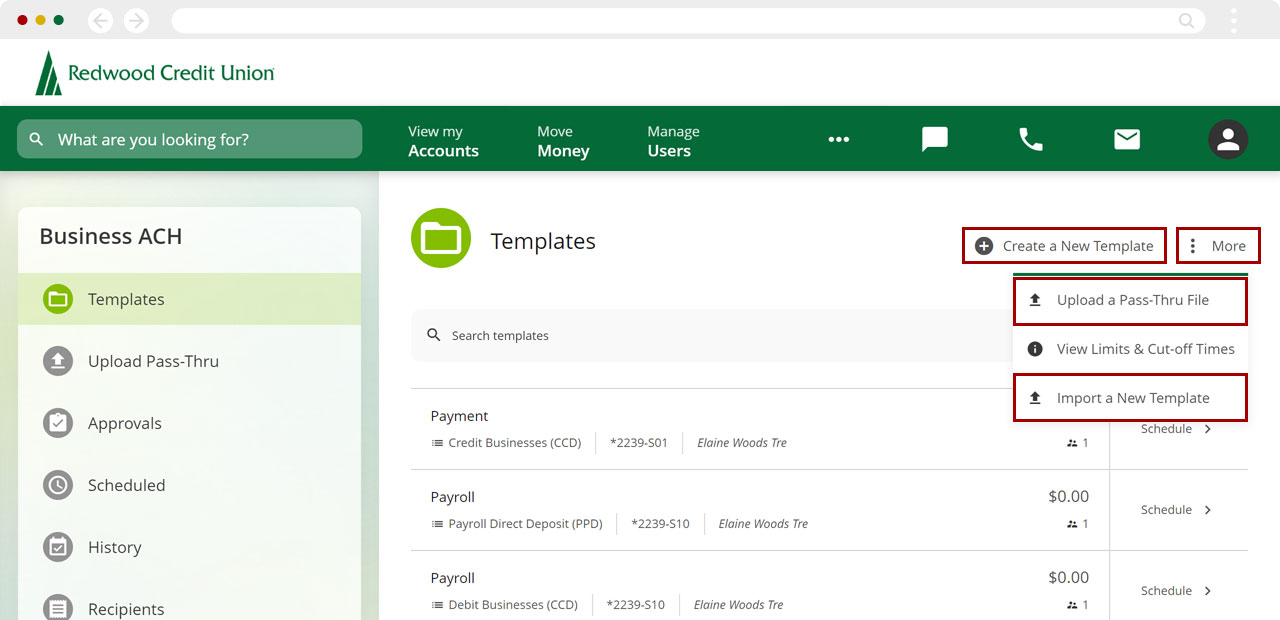
You can create a new template from scratch, import a new template, or upload a pass-thru file.
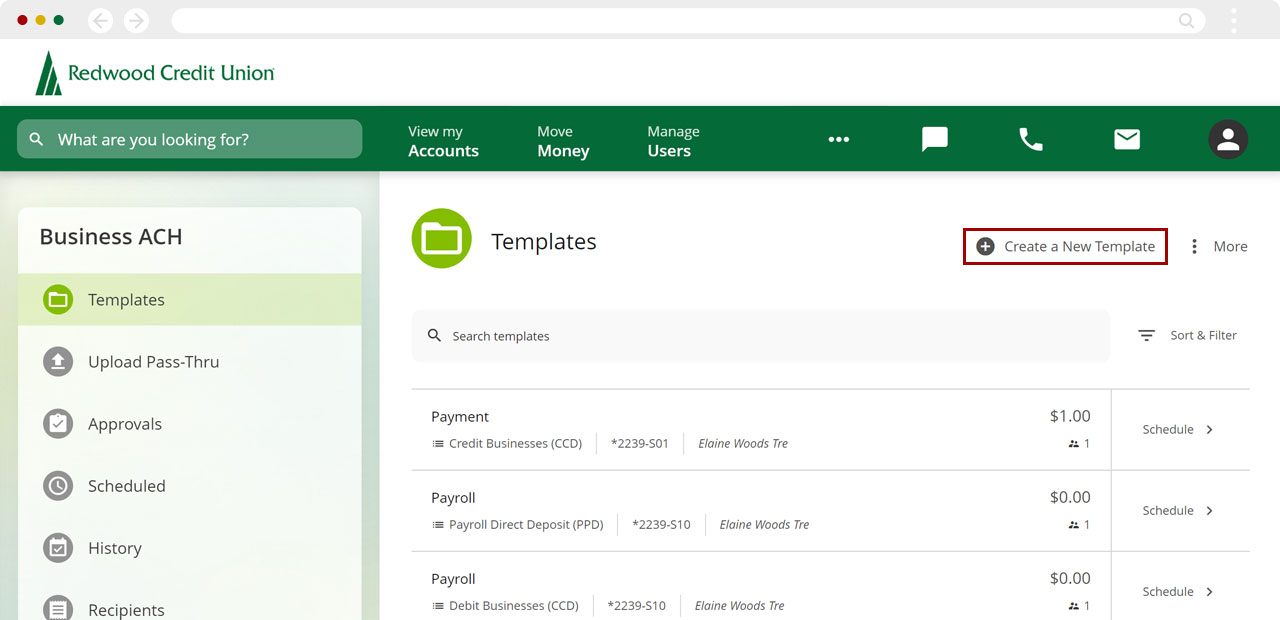
Create a New Template
Click Create a New Template.
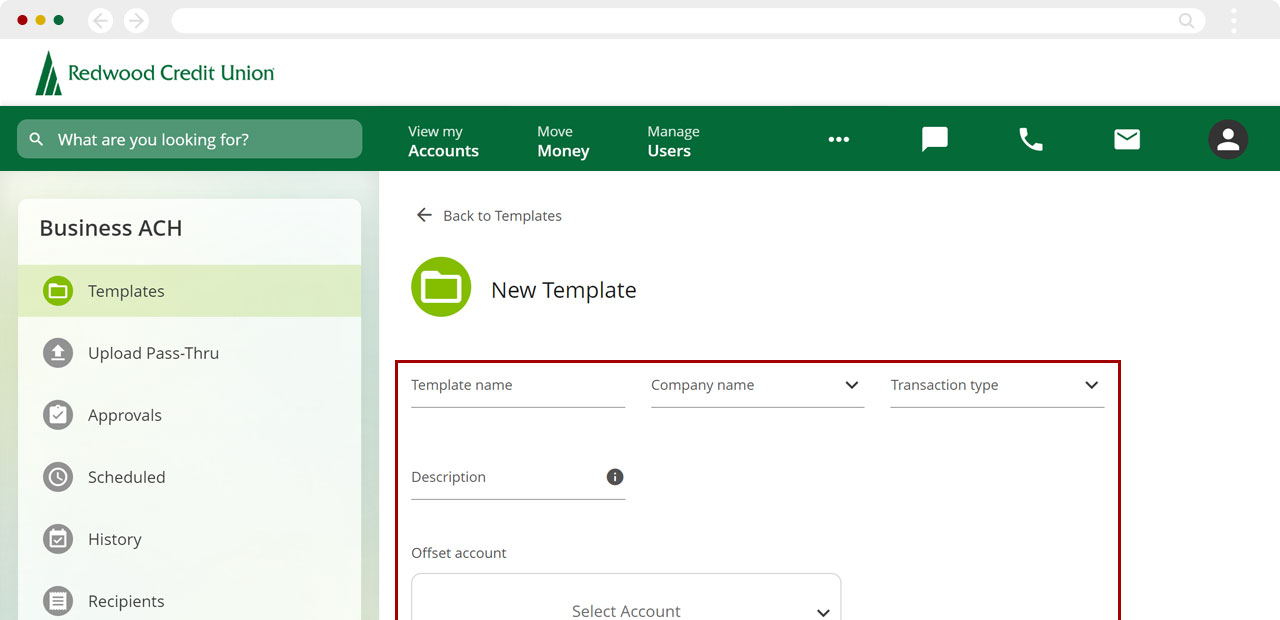
Complete the New Template details:
- Enter a Template Name.
- Select the Company Name from the drop-down menu.
- Select the Transaction Type (SEC code) to identify the transaction.
- Enter a template Description (Payroll, Billing, etc.)
- Choose the RCU offset account.
- If you wish to make it a restricted template, check the box.
Note: Restricted templates can only be used by sub-users with roles allowing access to restricted templates. A restricted template means that others who do not have that access will not see the template. An example would be a holiday bonus.
Once you have completed all the fields, click Save.
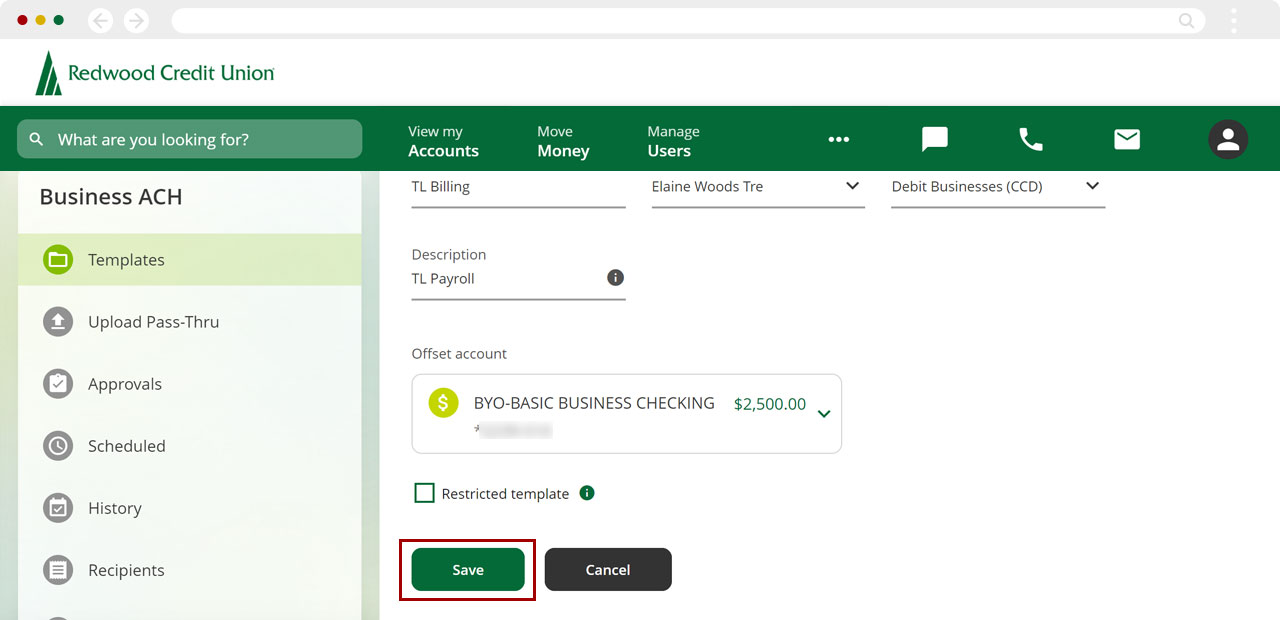
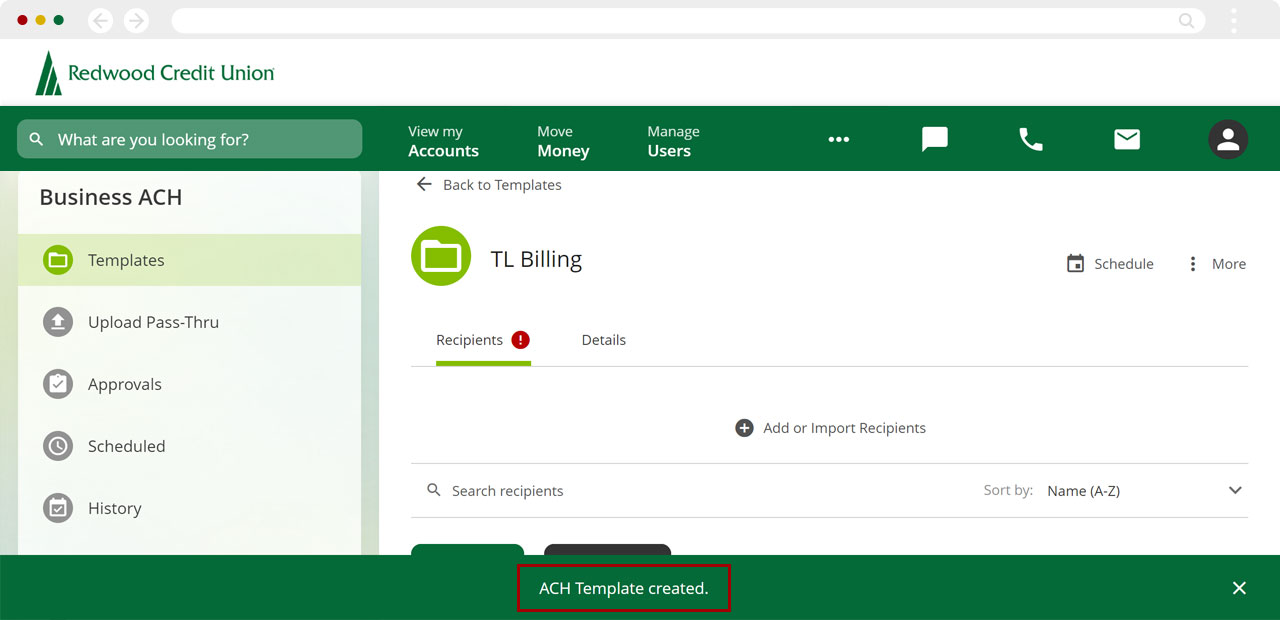
You will see a banner confirming your template was created.
Note: The red exclamation point indicates you need to add a recipient to the template.
Upload a Pass-Thru File
Click More next to Create a New Template, and select Upload a Pass-Thru File.
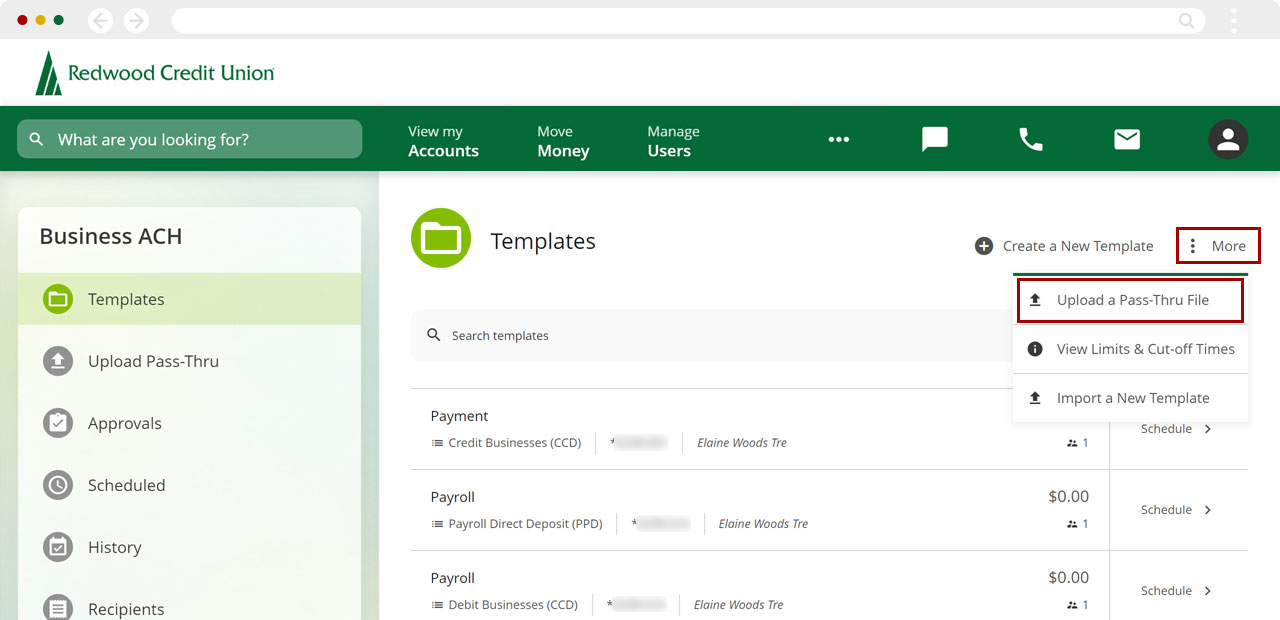
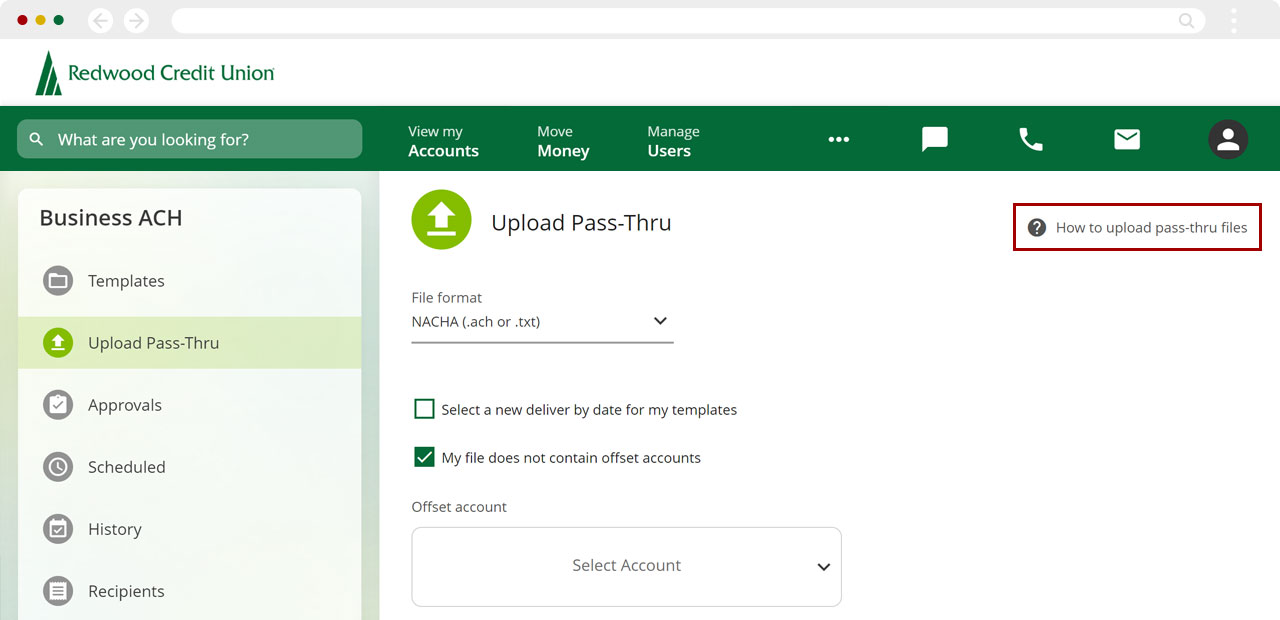
Select the deliver by date (if needed), file format, and offset account. Then upload the file and follow the prompts.
Note: For more information, click How to upload pass thru files on the top right.
Import a New Template
Click More next to Create a New Template, and select Import a New Template.
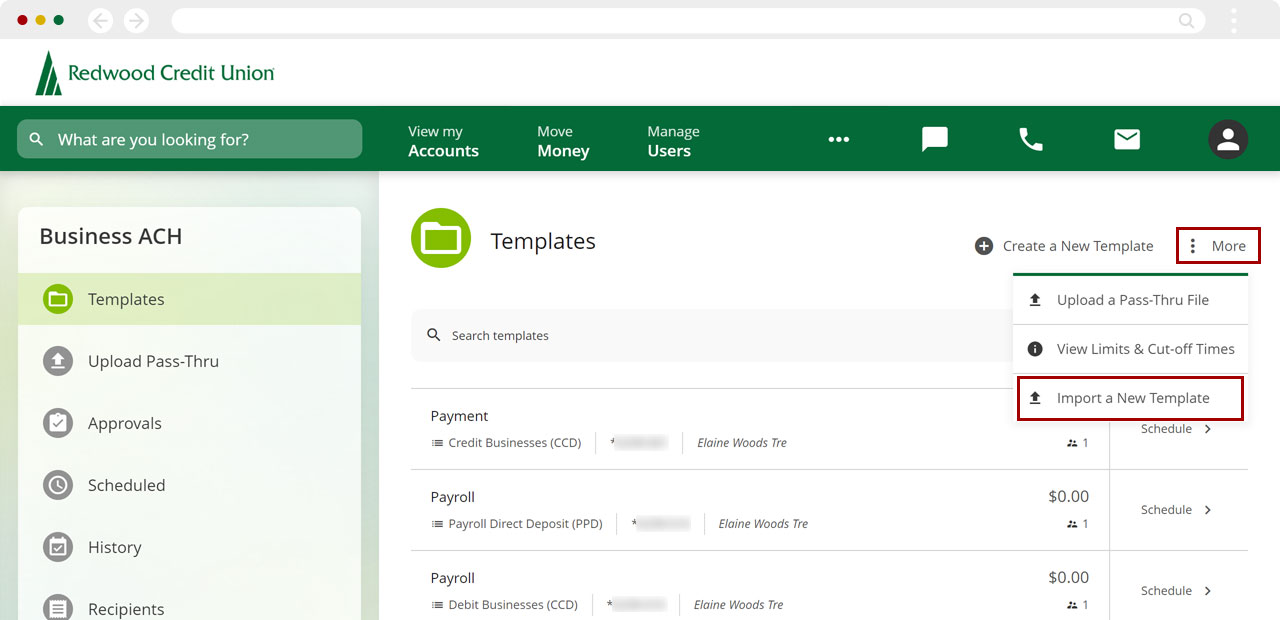
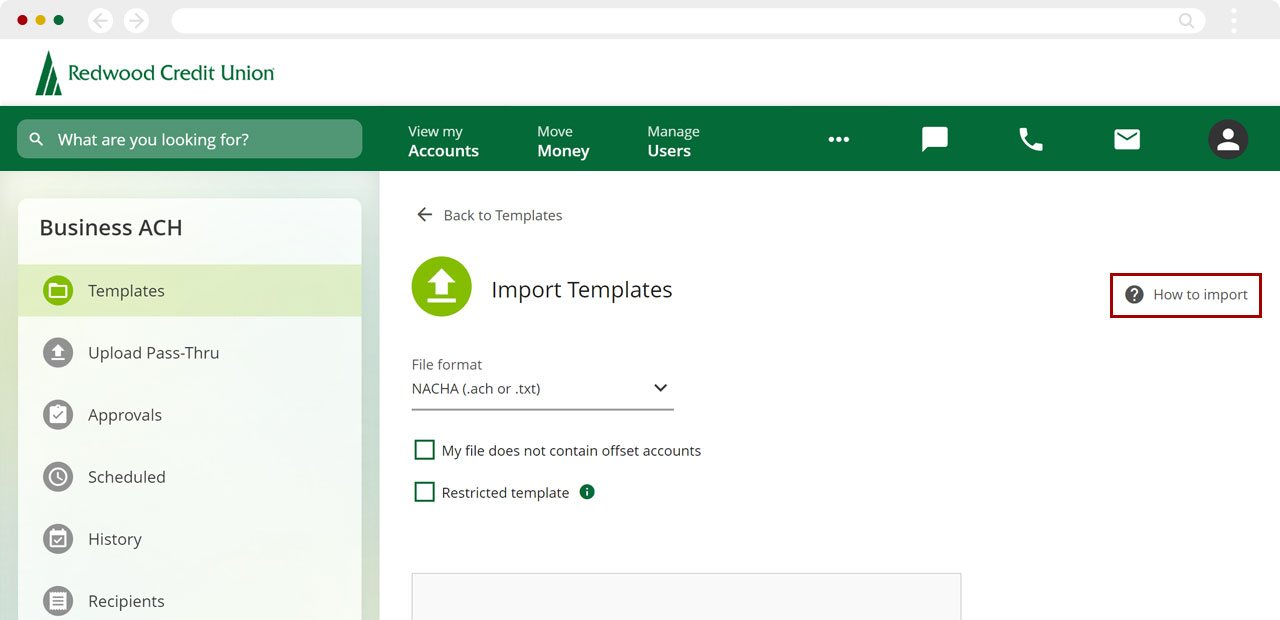
Select the deliver by date (if needed), file format, and offset account. Then upload the file and follow the prompts.
Note: For more information, click How to import on the top right.
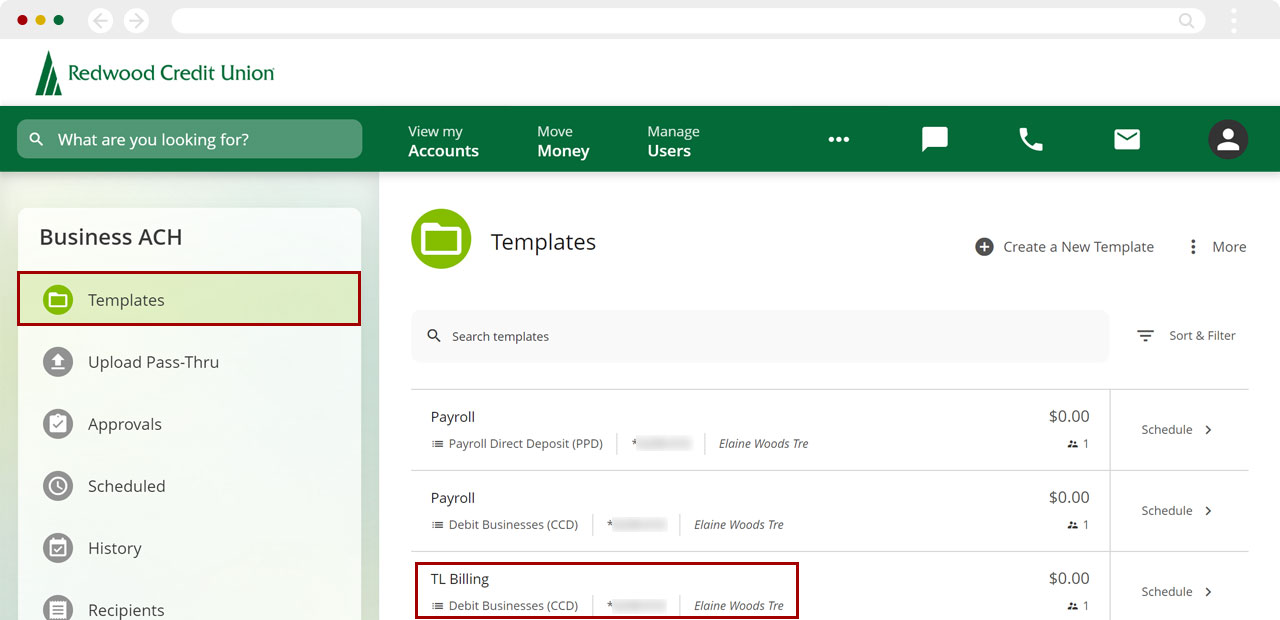
Edit Templates
From the Templates screen, click the template you want to edit.
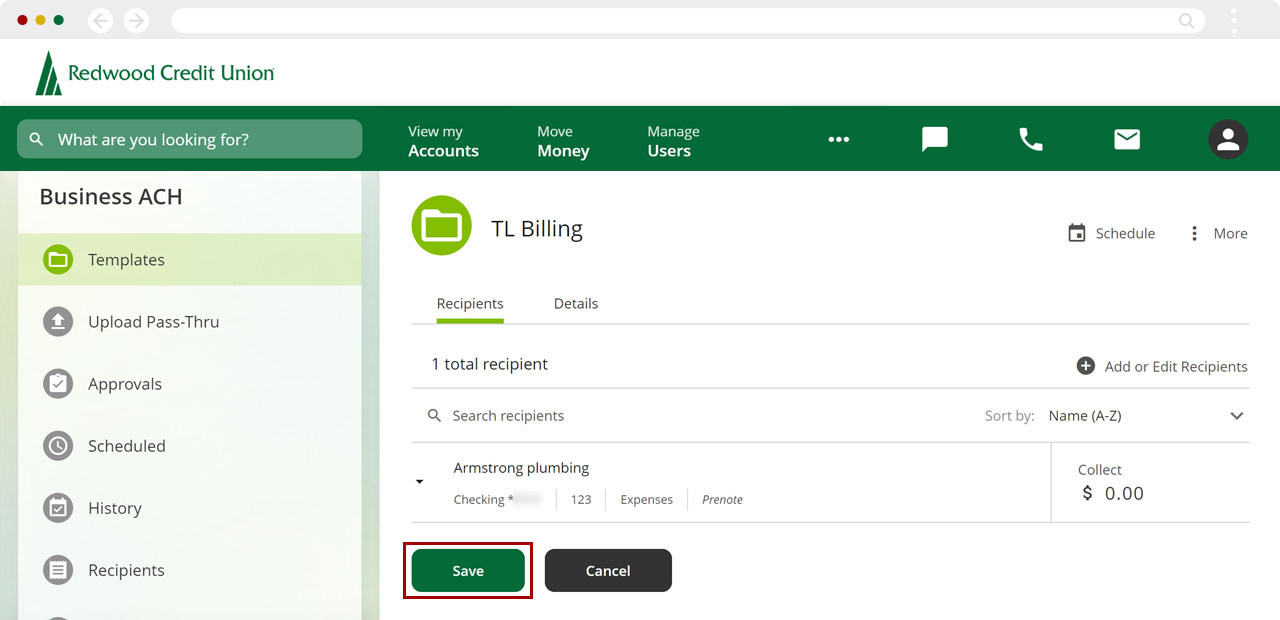
Adjust the template and click Save.
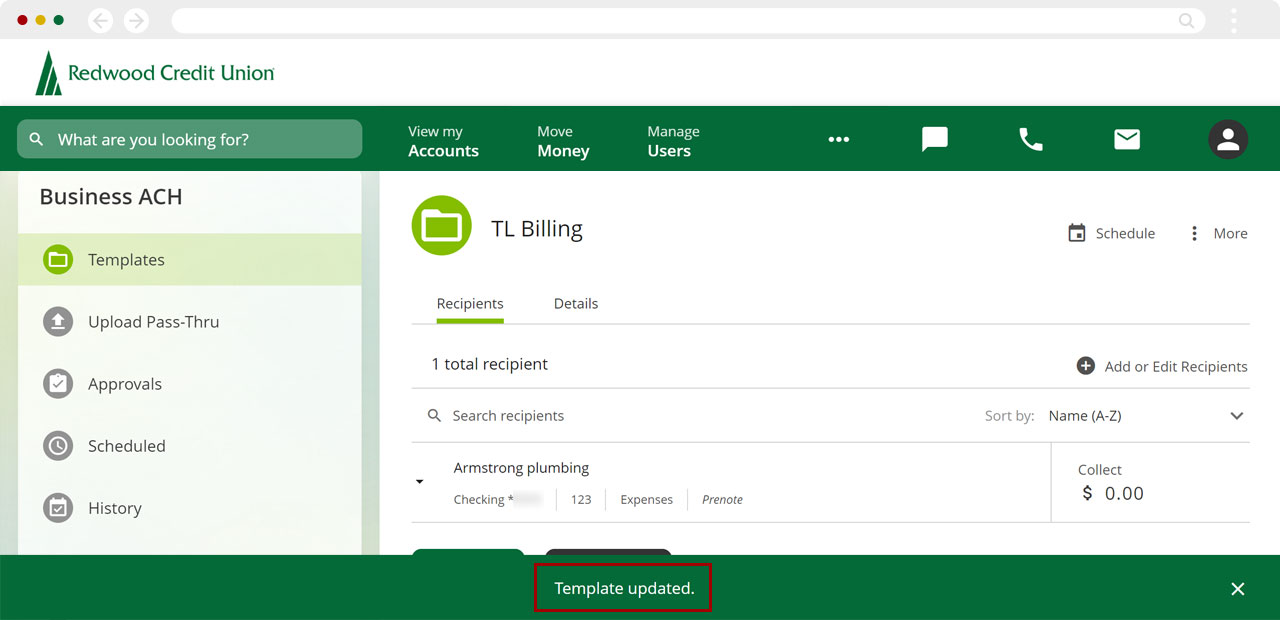
You will see a banner confirming the template was updated.
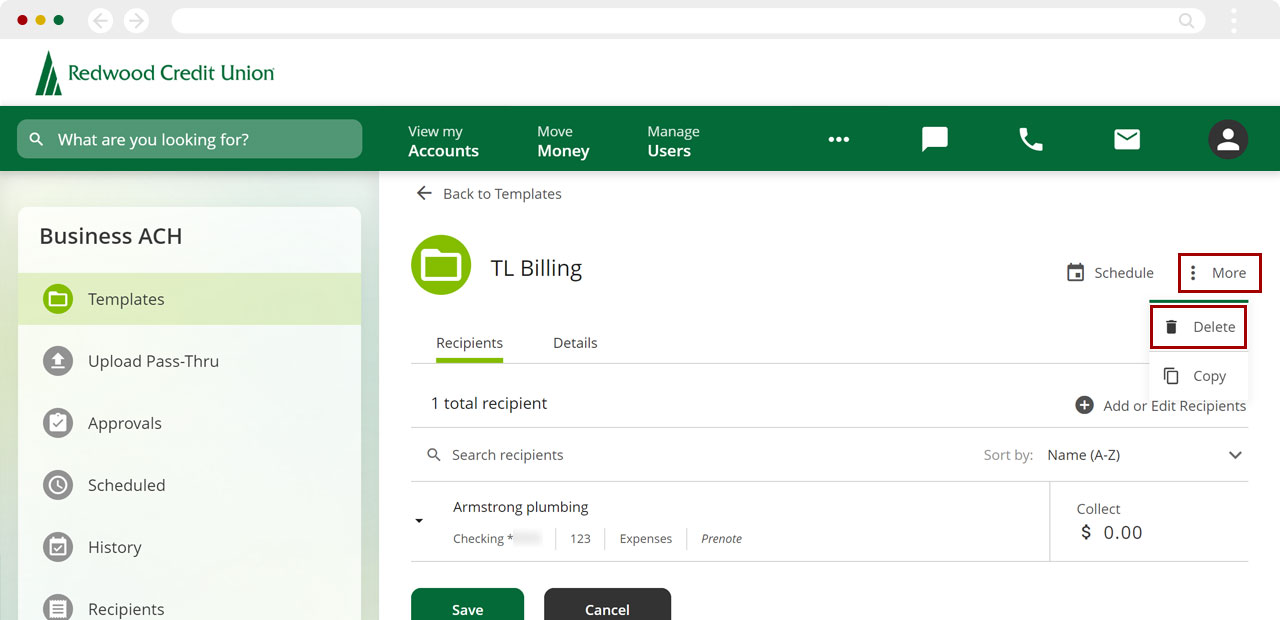
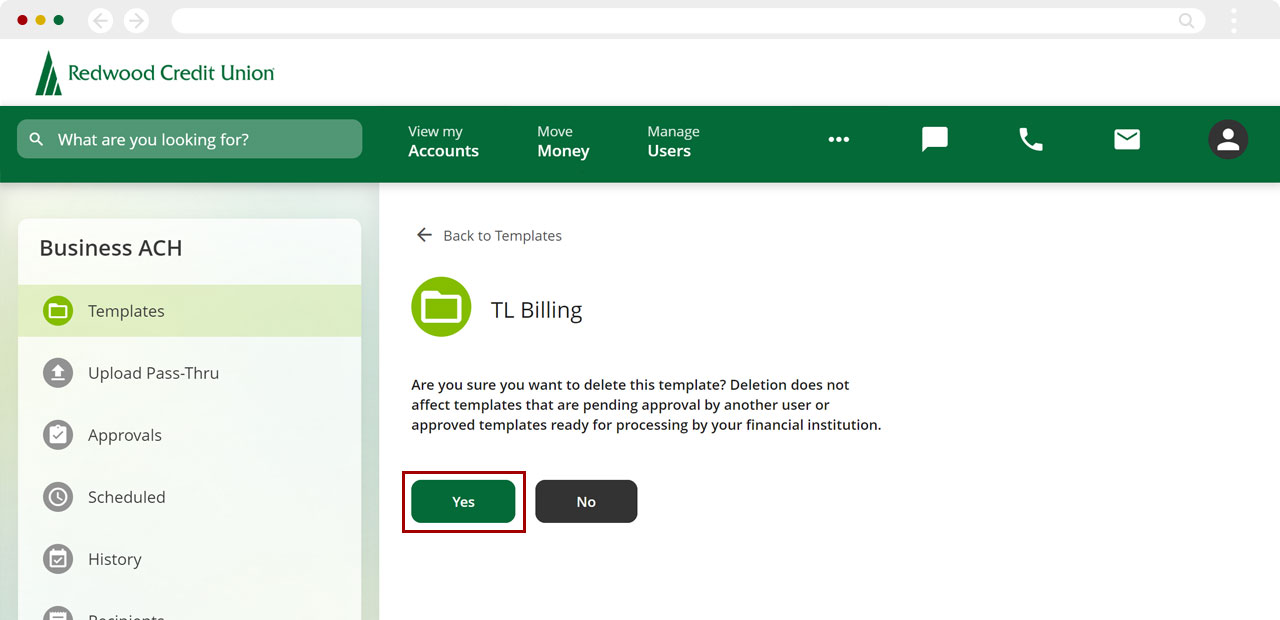
Delete Templates
From the Templates screen, click the template you want to edit.

Click More at top right (next to Schedule) and select Delete.
You will see a confirmation screen, click Yes to delete the template.
Important: Deletion does not affect templates that are pending approval by another user or approved templates ready for processing by your financial institution.
You will see a banner confirming the template was deleted.