
Bill Center: How to edit or delete a recurring payment
This article covers steps within the updated Bill Center experience. To access the Bill Pay guide, view: Bill Pay: How to edit/delete payment.
This article covers the following topics:
Mobile
If you're using a mobile device, follow the steps below. For computers, go to the desktop steps.
At the bottom right, select the Menu.
.png)
Select Use Bill Pay.
.png)
How to edit a recurring payment
Under Activity, select List View. To find the payment you want to edit, you can:
- Scroll down under the Upcoming (next 7 days) or Later sections.
- Use the search bar.
- Or use the filter button to narrow down the results (e.g., Status = Scheduled).
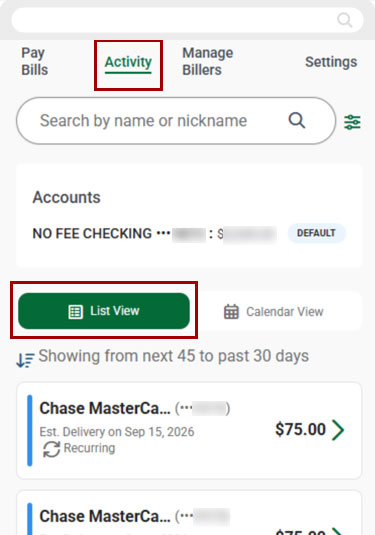
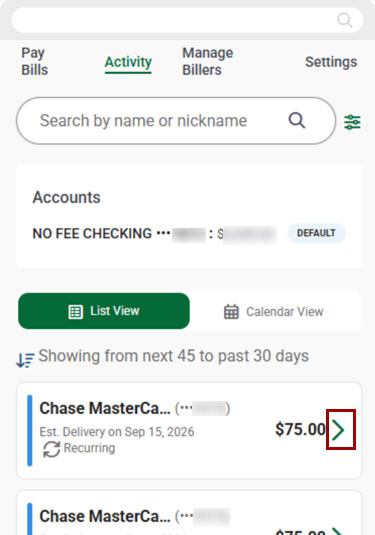
Select the > arrow, then select View Details.
.jpg)
At the bottom of the page, select Edit Payment.
.jpg)
Select either This payment only (for a single payment) or The series of payments including this payment (for a payment series).
.jpg)
Select Edit Scheduled Payment.
.jpg)
When edits are complete select Save and Continue to update the payment.
.jpg)
How to delete a recurring payment
Under Activity, select List View. To find the payment you want to delete, you can:
- Scroll down under the Upcoming (next 7 days) or Later sections.
- Use the search bar.
- Or use the filter button to narrow down the results (e.g., Status = Scheduled).
Select the > arrow, then select View Details.
Select Delete Payment.
.jpg)
To delete this payment, choose the This payment only option. To delete the recurring series, select The series of payments, including this payment. Then select Delete Scheduled payment. To keep the payment/series, select Cancel.
.png)
Desktop
If you're using a computer, follow the steps below. For mobile devices, go to the mobile steps.
From the top menu, select Use Bill Pay.
.png)
How to edit a recurring payment
Under Activity, select List View. To find the payment you want to edit, you can:
- Scroll down under the Upcoming (next 7 days) or Later sections.
- Use the search bar.
- Or use the filter button to narrow down the results (e.g. Status = Scheduled).
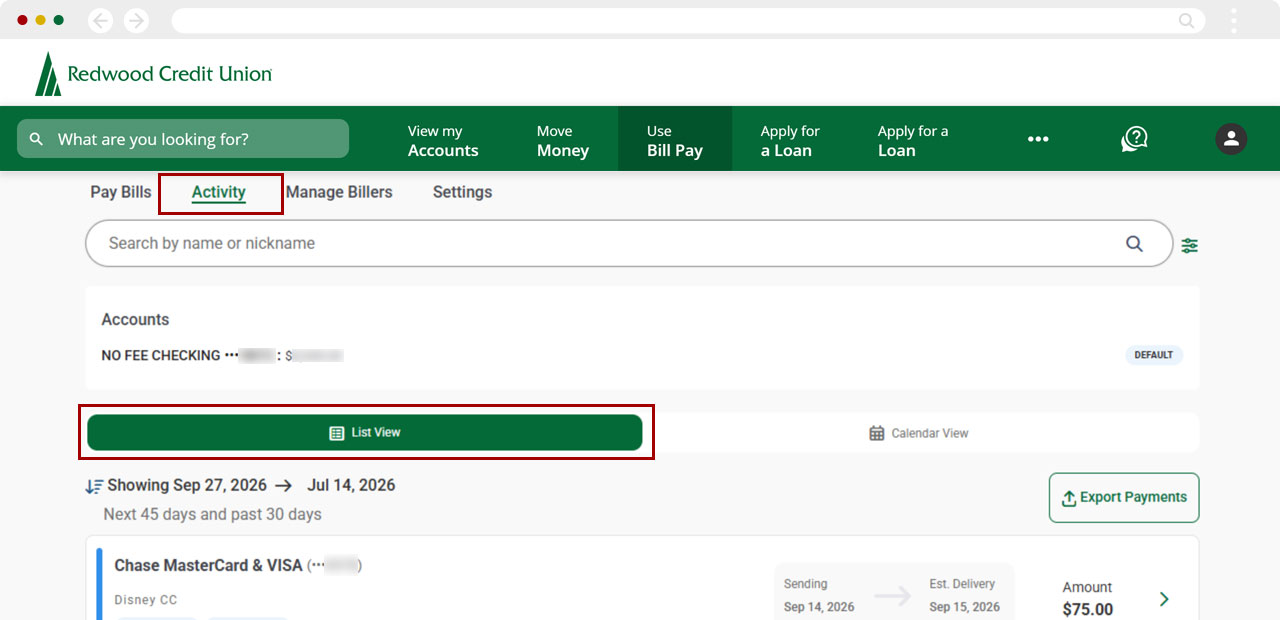
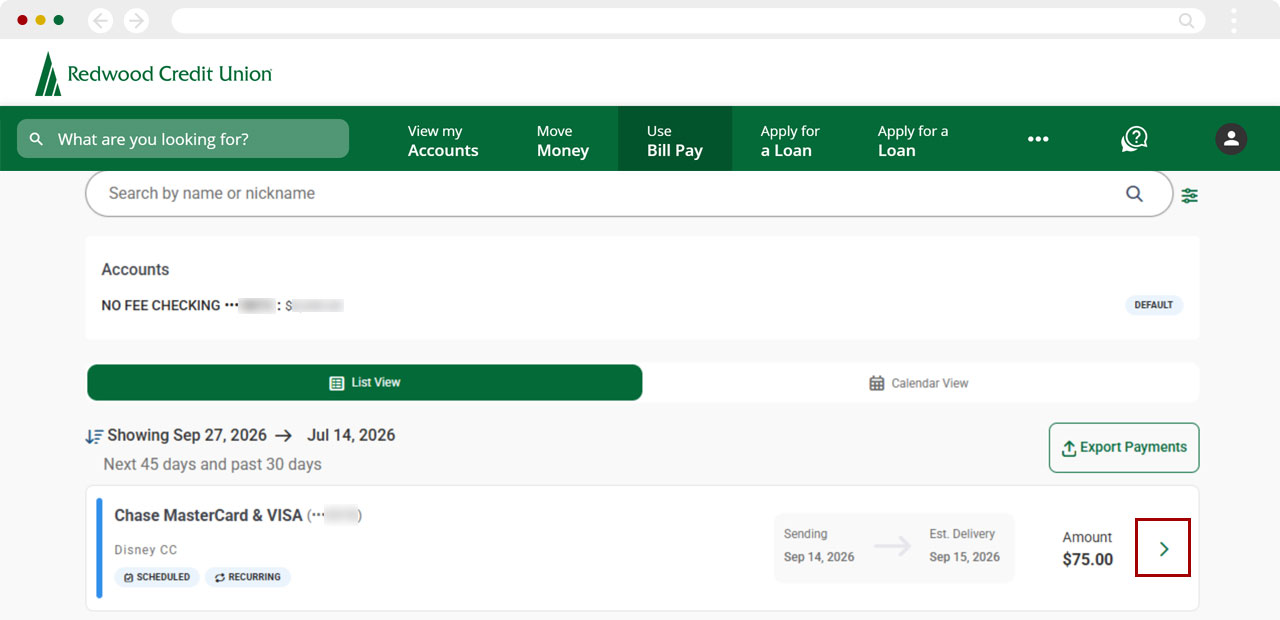
Select the > arrow, then select Edit Payment.
.jpg)
Select either This payment only (for a single payment) or The series of payments including this payment (for a payment series).
.jpg)
Select Edit Scheduled Payment.
.jpg)
When edits are complete select Save and Continue to update the payment.
.jpg)
How to delete a recurring payment
Under Activity, select List View. To find the payment you want to delete, you can:
- Scroll under the Upcoming (next 7 days) or Later sections.
- Use the search bar.
- Or use the filter button to narrow down the results (e.g. Status = Scheduled).
Select the > arrow then, select View Payment Details.
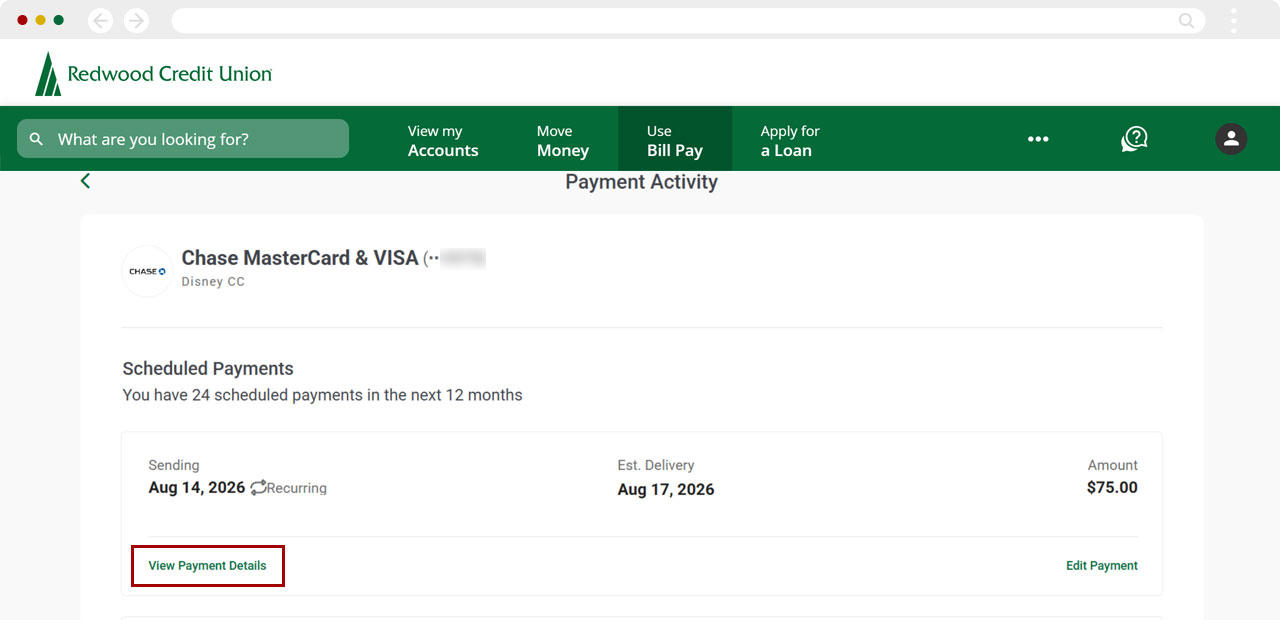
Select Delete Payment.
.jpg)
To delete this payment, choose the This payment only option. To delete the recurring series, select The series of payments, including this payment. Then select Delete Scheduled payment. To keep the payment/series, select Cancel.
.png)
